Musings from the mind of a modern day Sue.

Archive for the ‘Finishing the Quilt’ Category

Album or Chimney Sweep block – A Wedding Quilt Journey

I began a quilt for my nephew & his wife on the day they were married. I placed 2-1/2 X 5 inch muslin strips backed with freezer paper onto a table at the reception and invited guests to sign their name in the center. Some guests drew photos while others wrote messages. I collected 52 signatures.

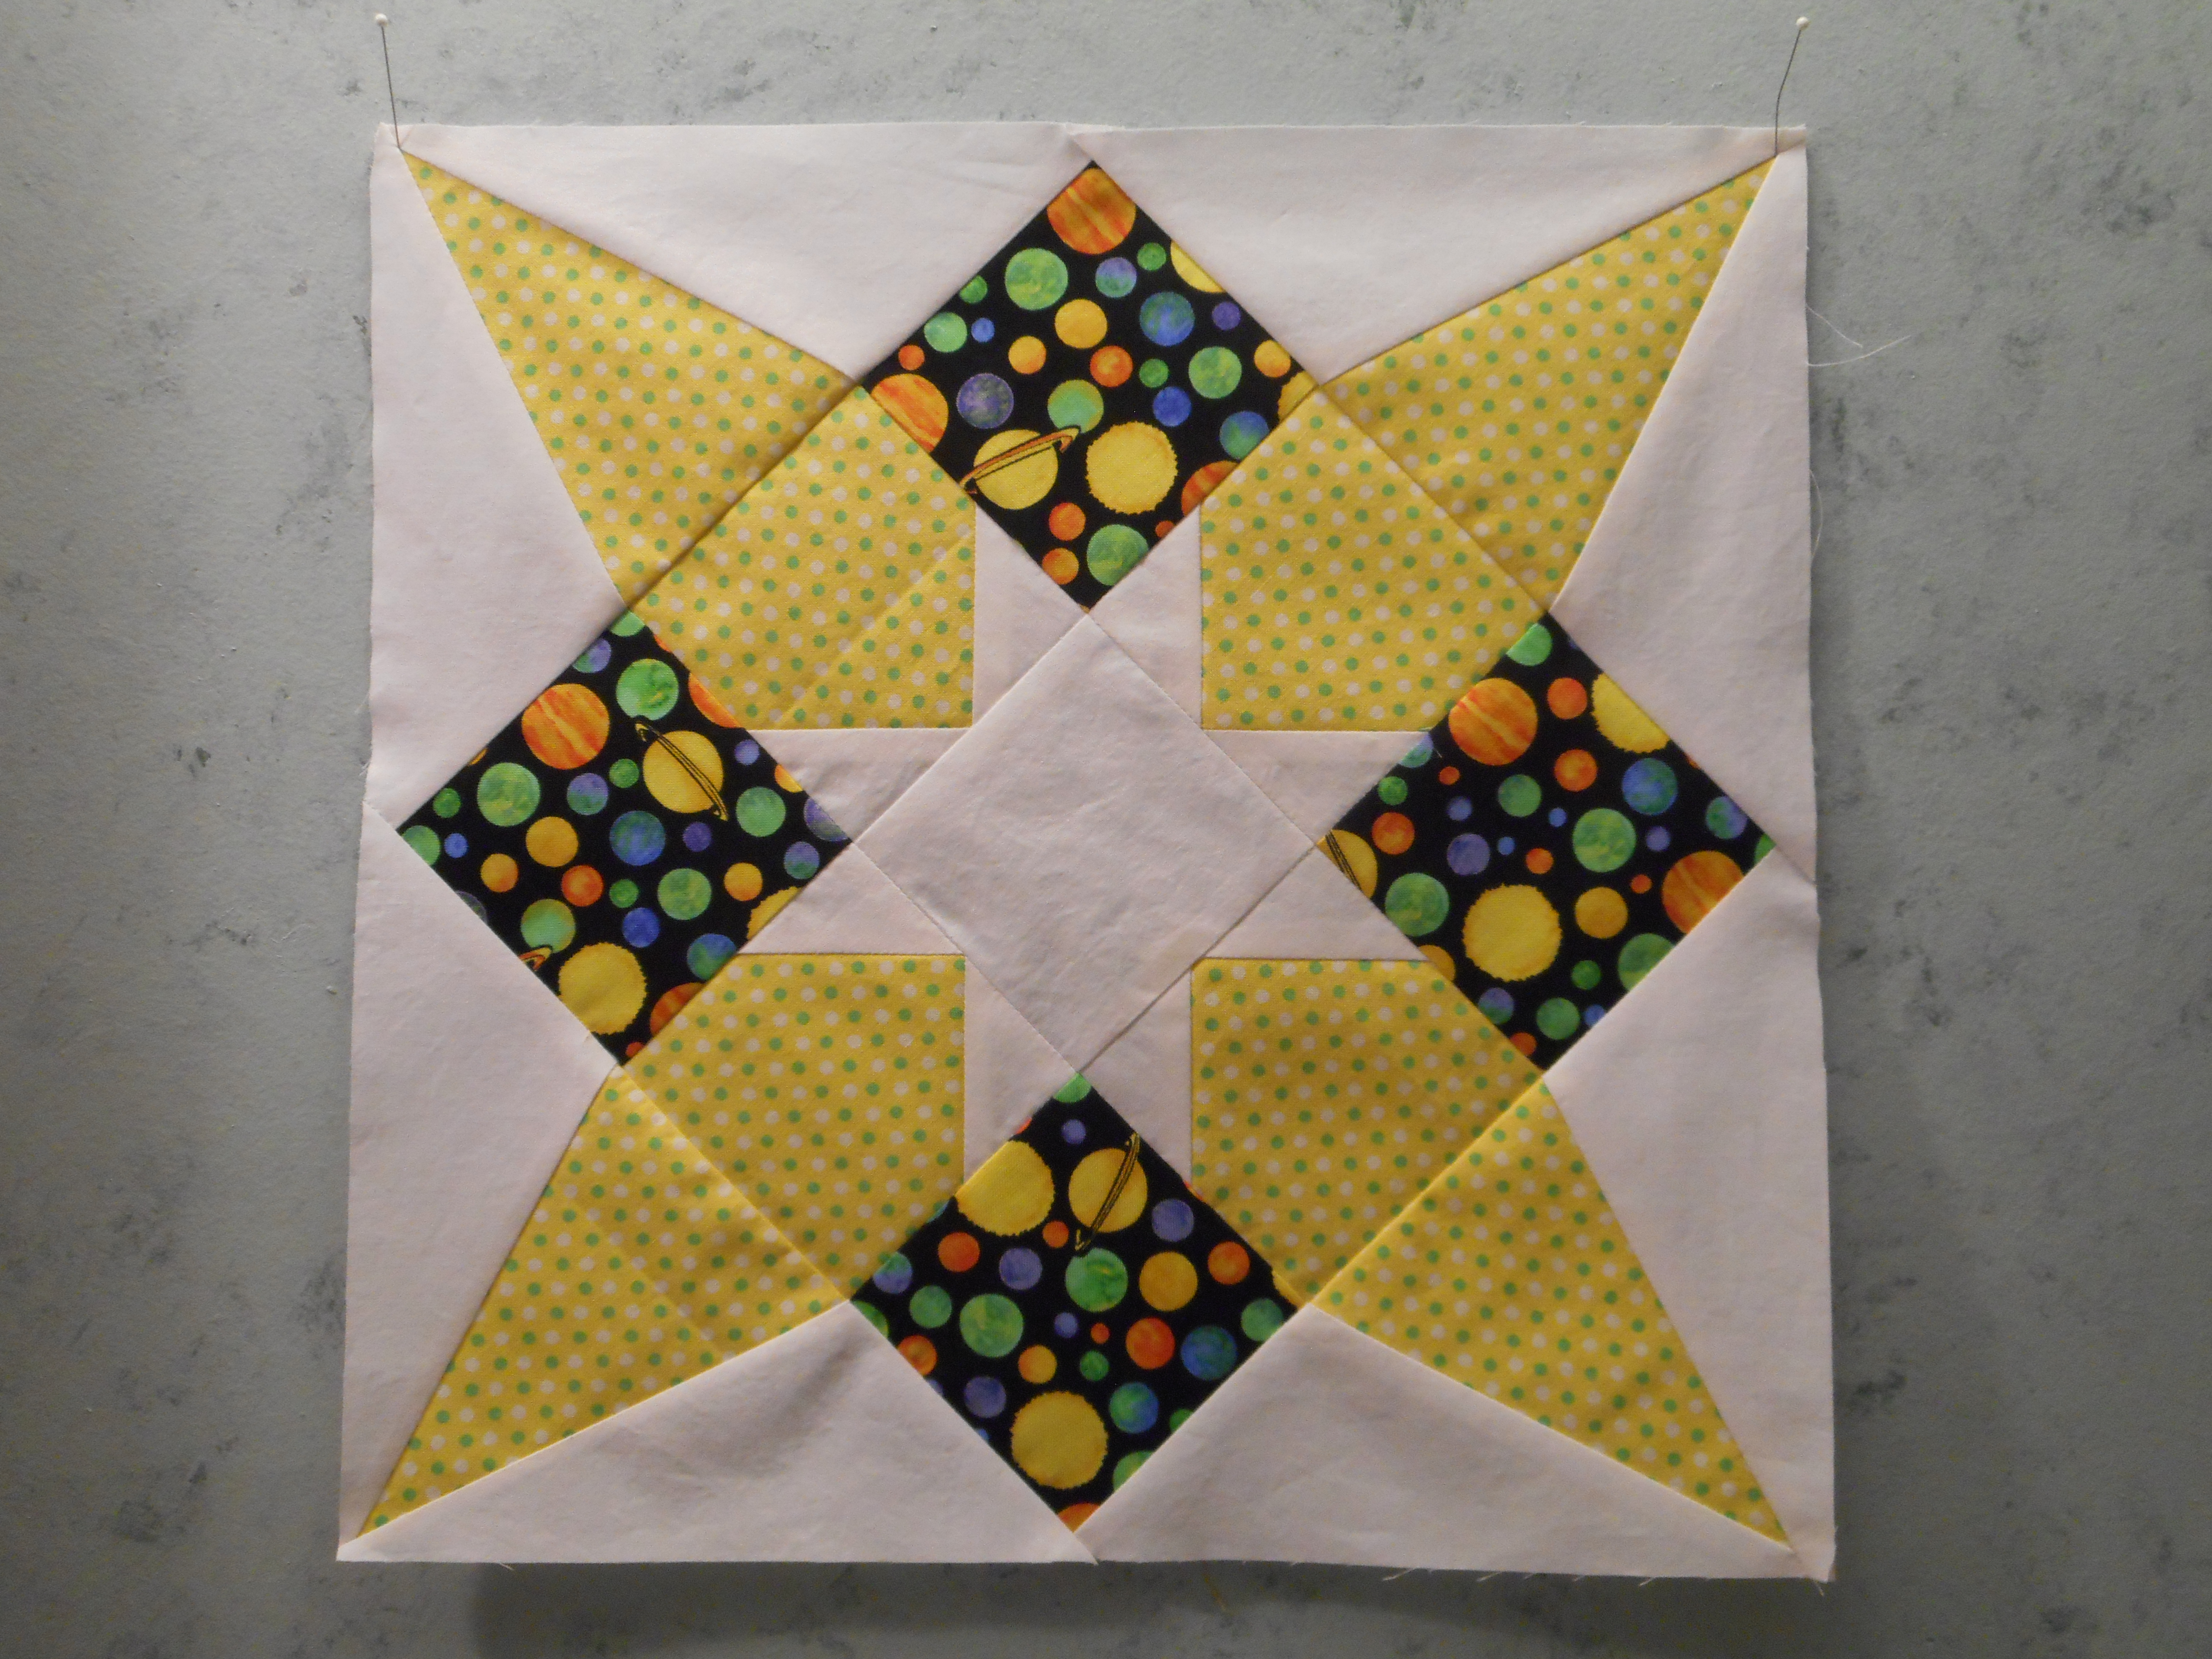
The signatures languished in a box for more than a year while I continued collecting purple fabrics, the brides favorite color, and drafted a block using a photo of a chimney sweep quilt in a book I had owned for years. The chimney sweep block has triangles inset along the edge leaving a bias border. I didn’t want to work with bias edge blocks.

Enter Pat Holly, acclaimed quilter with several AQS Best of Show wins. I attended the 3rd annual Holly Girls Quilt Retreat (HGQR) in northern Michigan in September 2016. Pat broke the block down into two alternating sections to create a block made only of squares & rectangles. One block incorporated the signature sections. The alternating block had to be sewn using fabrics from the four adjoining signature blocks. I could only work with a few blocks at a time to avoid placing the fabrics in the wrong location.

A portion of the quilt on the right which I accomplished during the HGQR thanks to the ingenuity of Pat Holly.

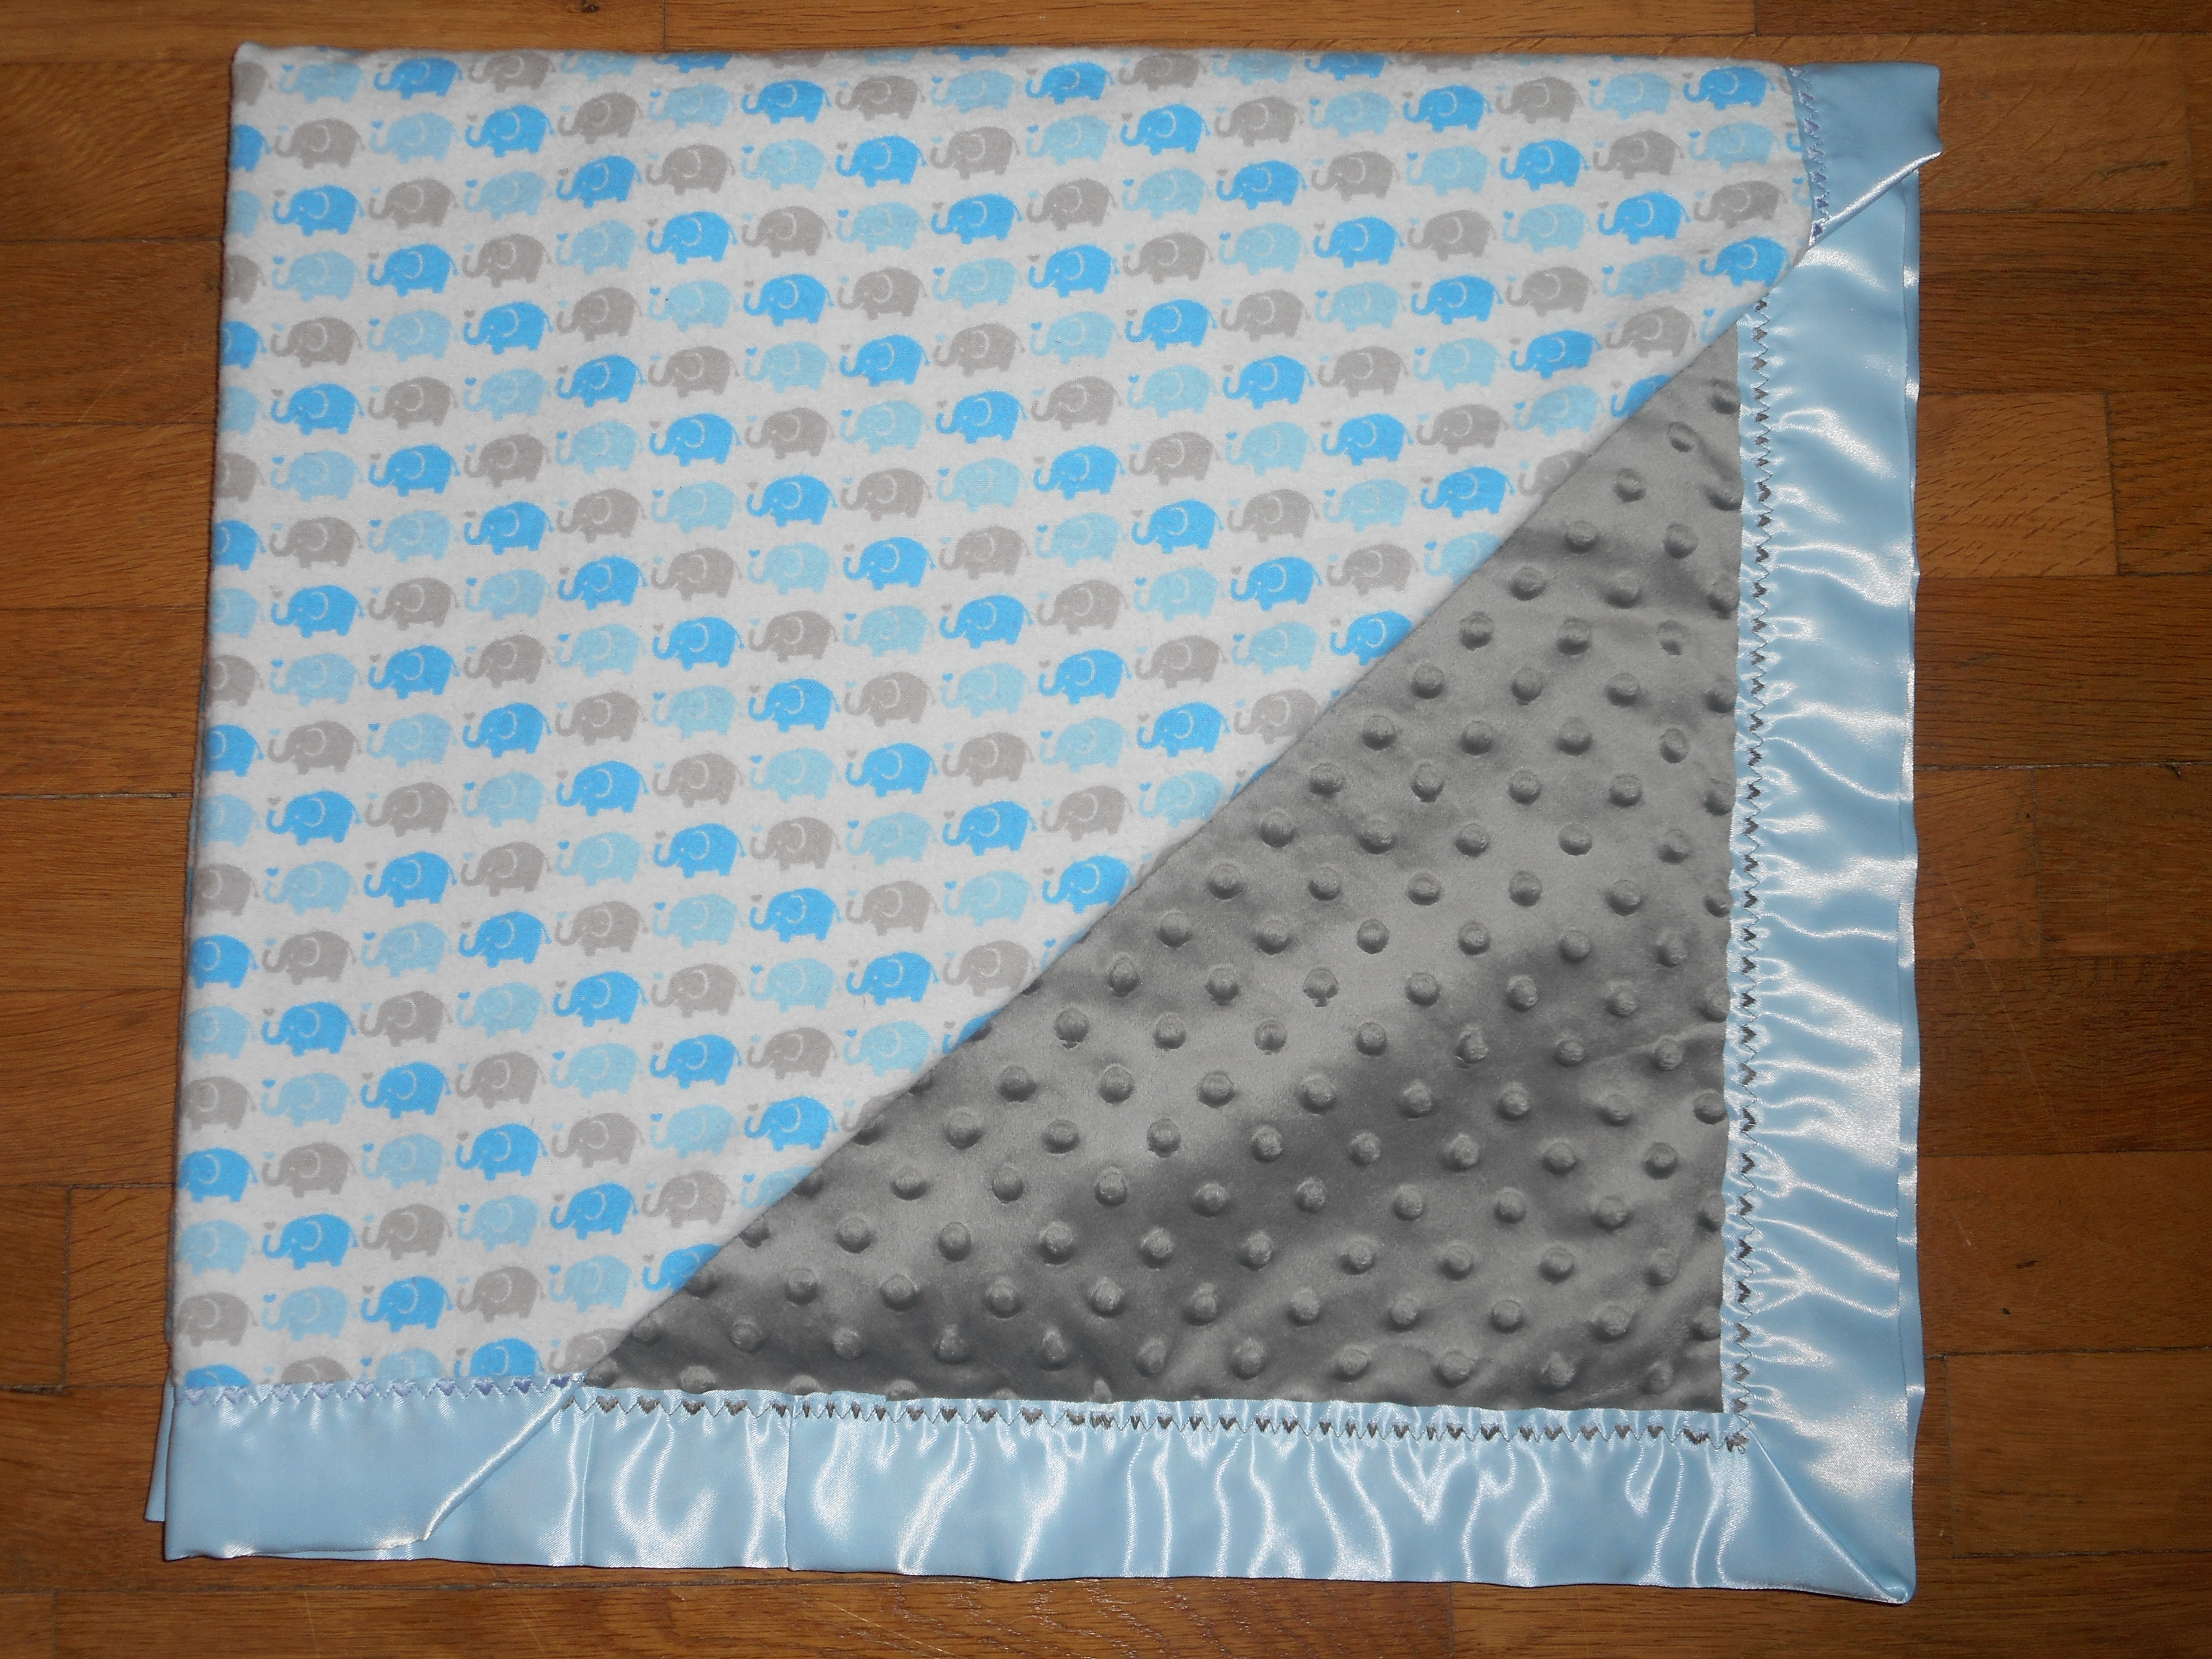
Life always gets in the way of finishing things I begin, especially quilts. I had two new grandson born and several nieces & nephews. Each received a baby quilt. The wedding quilt had to wait

I also do better with deadlines. I decided I must finish this quilt for the sake of the bride’s mother. A friend as well, Shana had terminal cancer. Unfortunately, I did not complete it in time for she passed away in February just before the pandemic shut everything down. Now I must make the quilt a priority. With a 5th anniversary looming, I worked away at the quilt.

But although I knew how to produce block sections, I couldn’t visualize how to finish the quilt. I used my seam ripper so often, I became discouraged. As I sewed blocks into the quilt, I was often saddened. At least 6 people had passed away. The quilt would not be finished by their 5th anniversary.

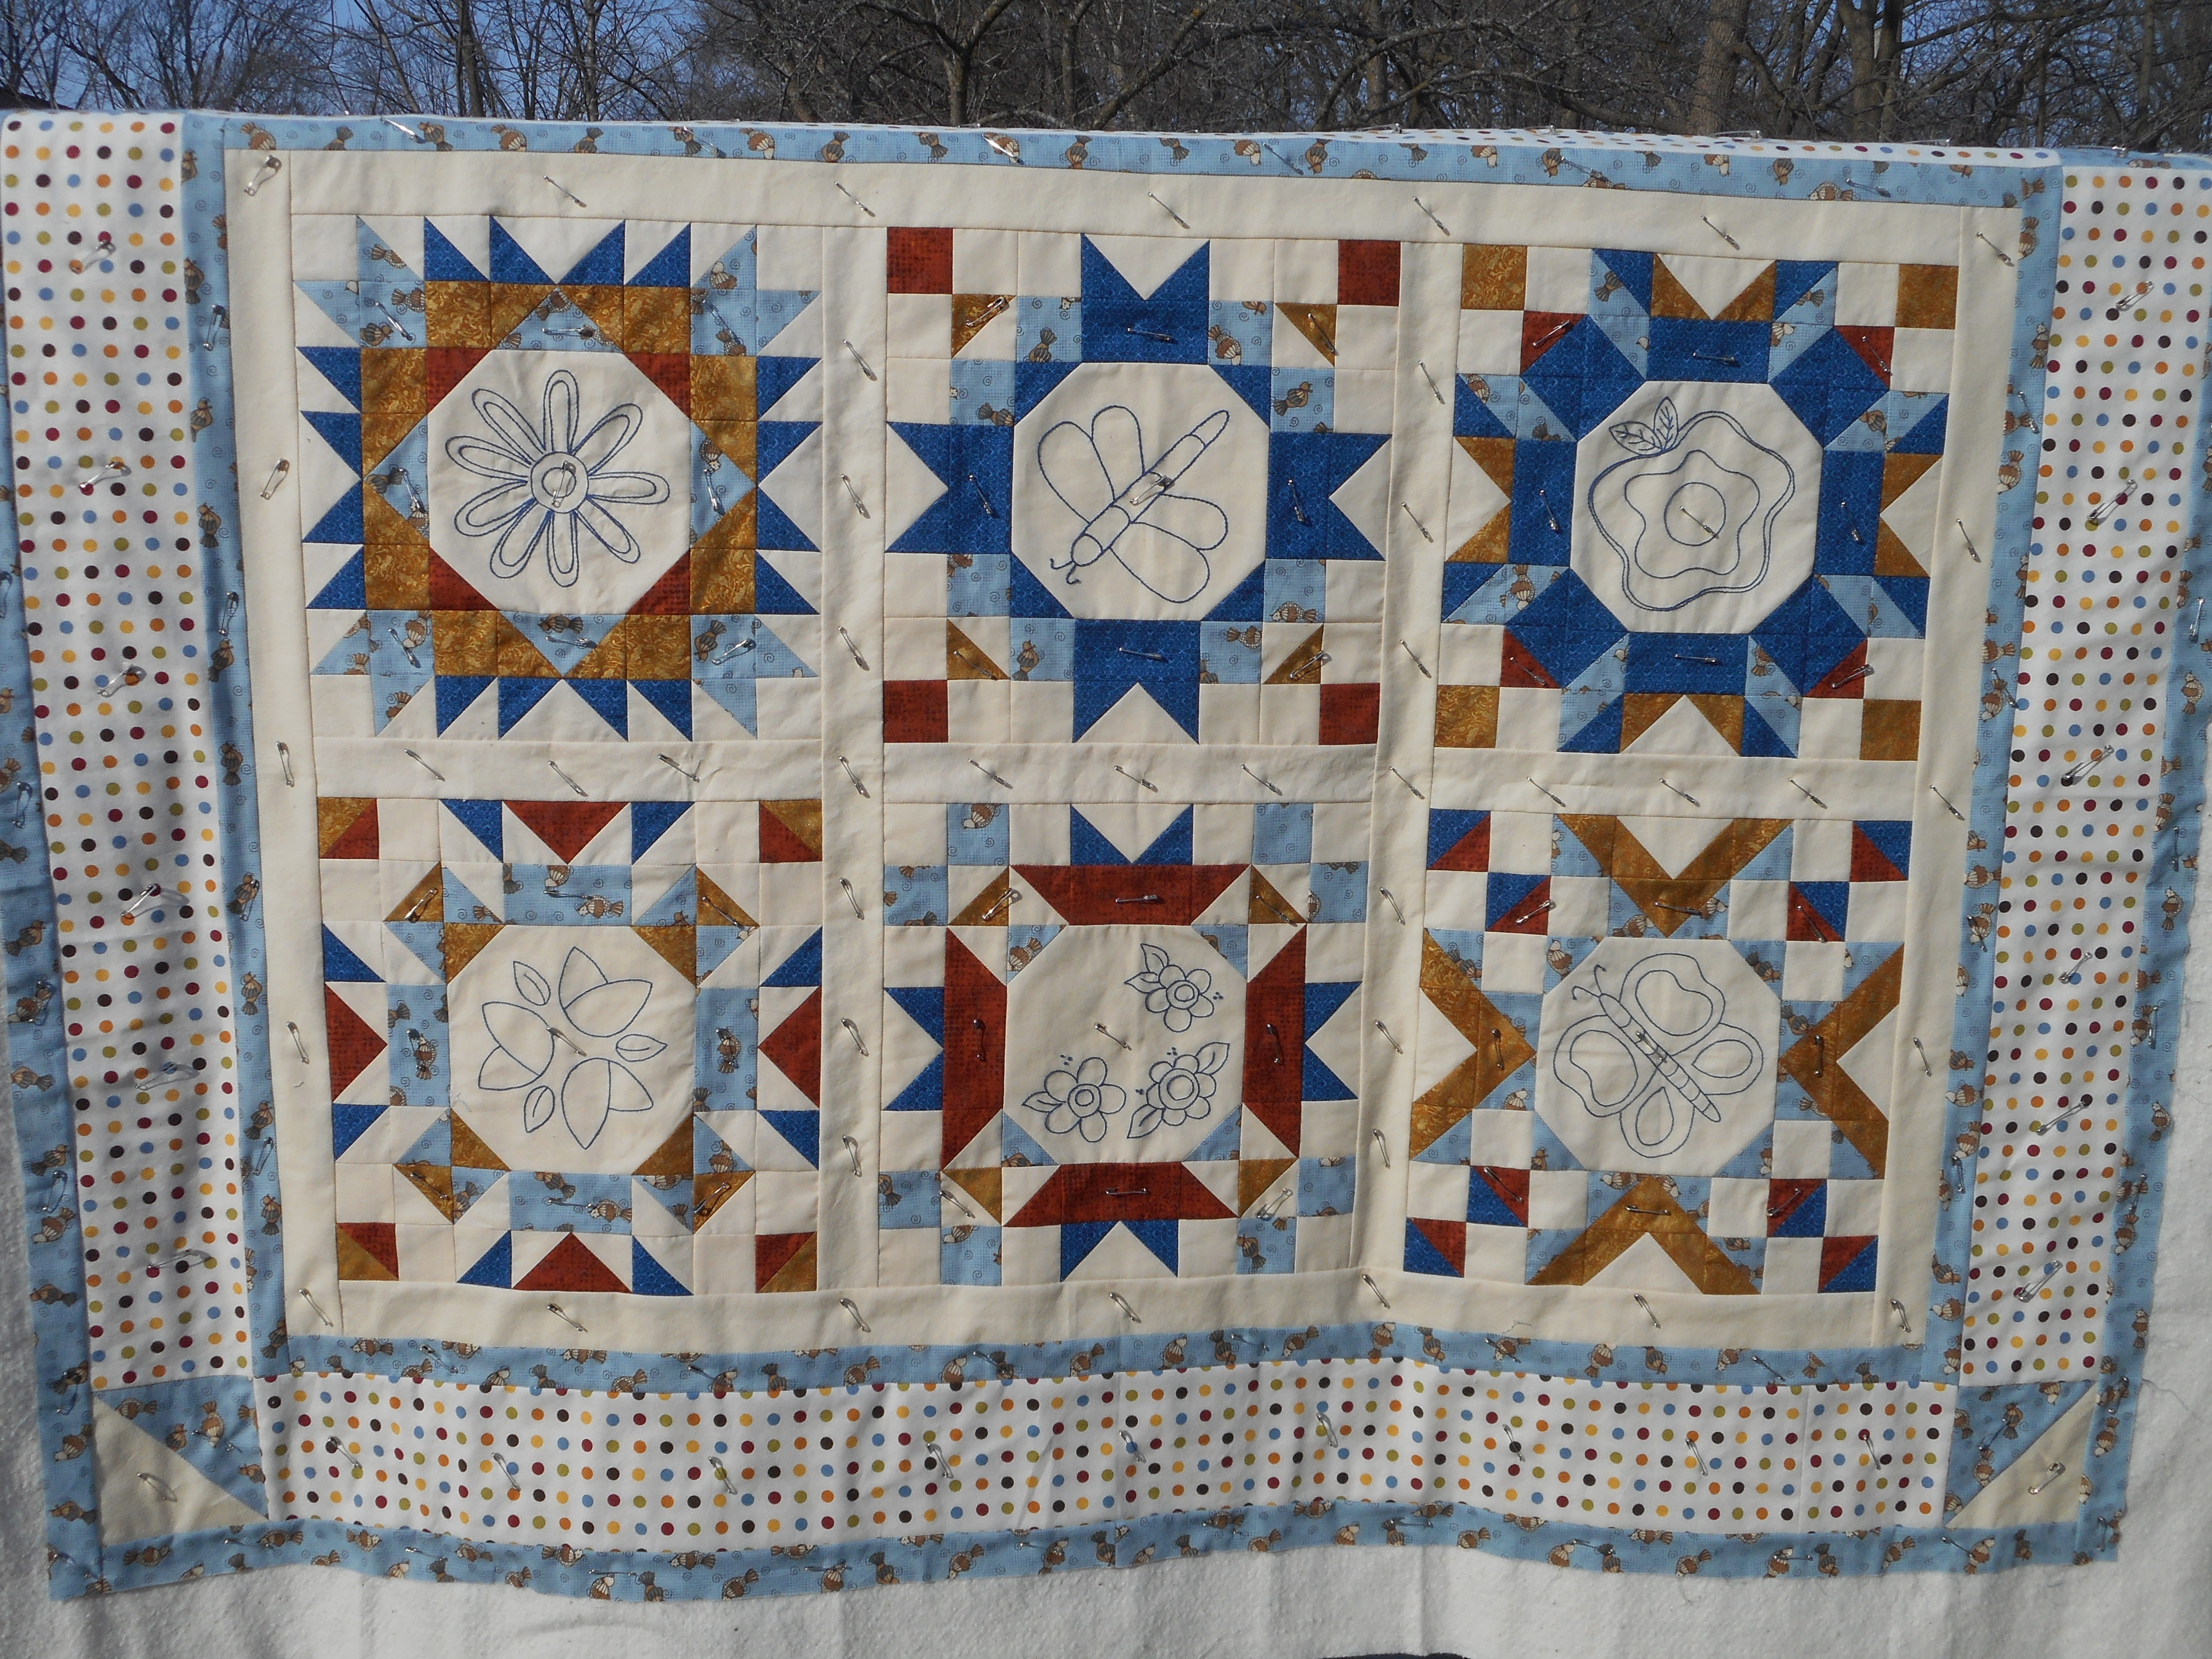
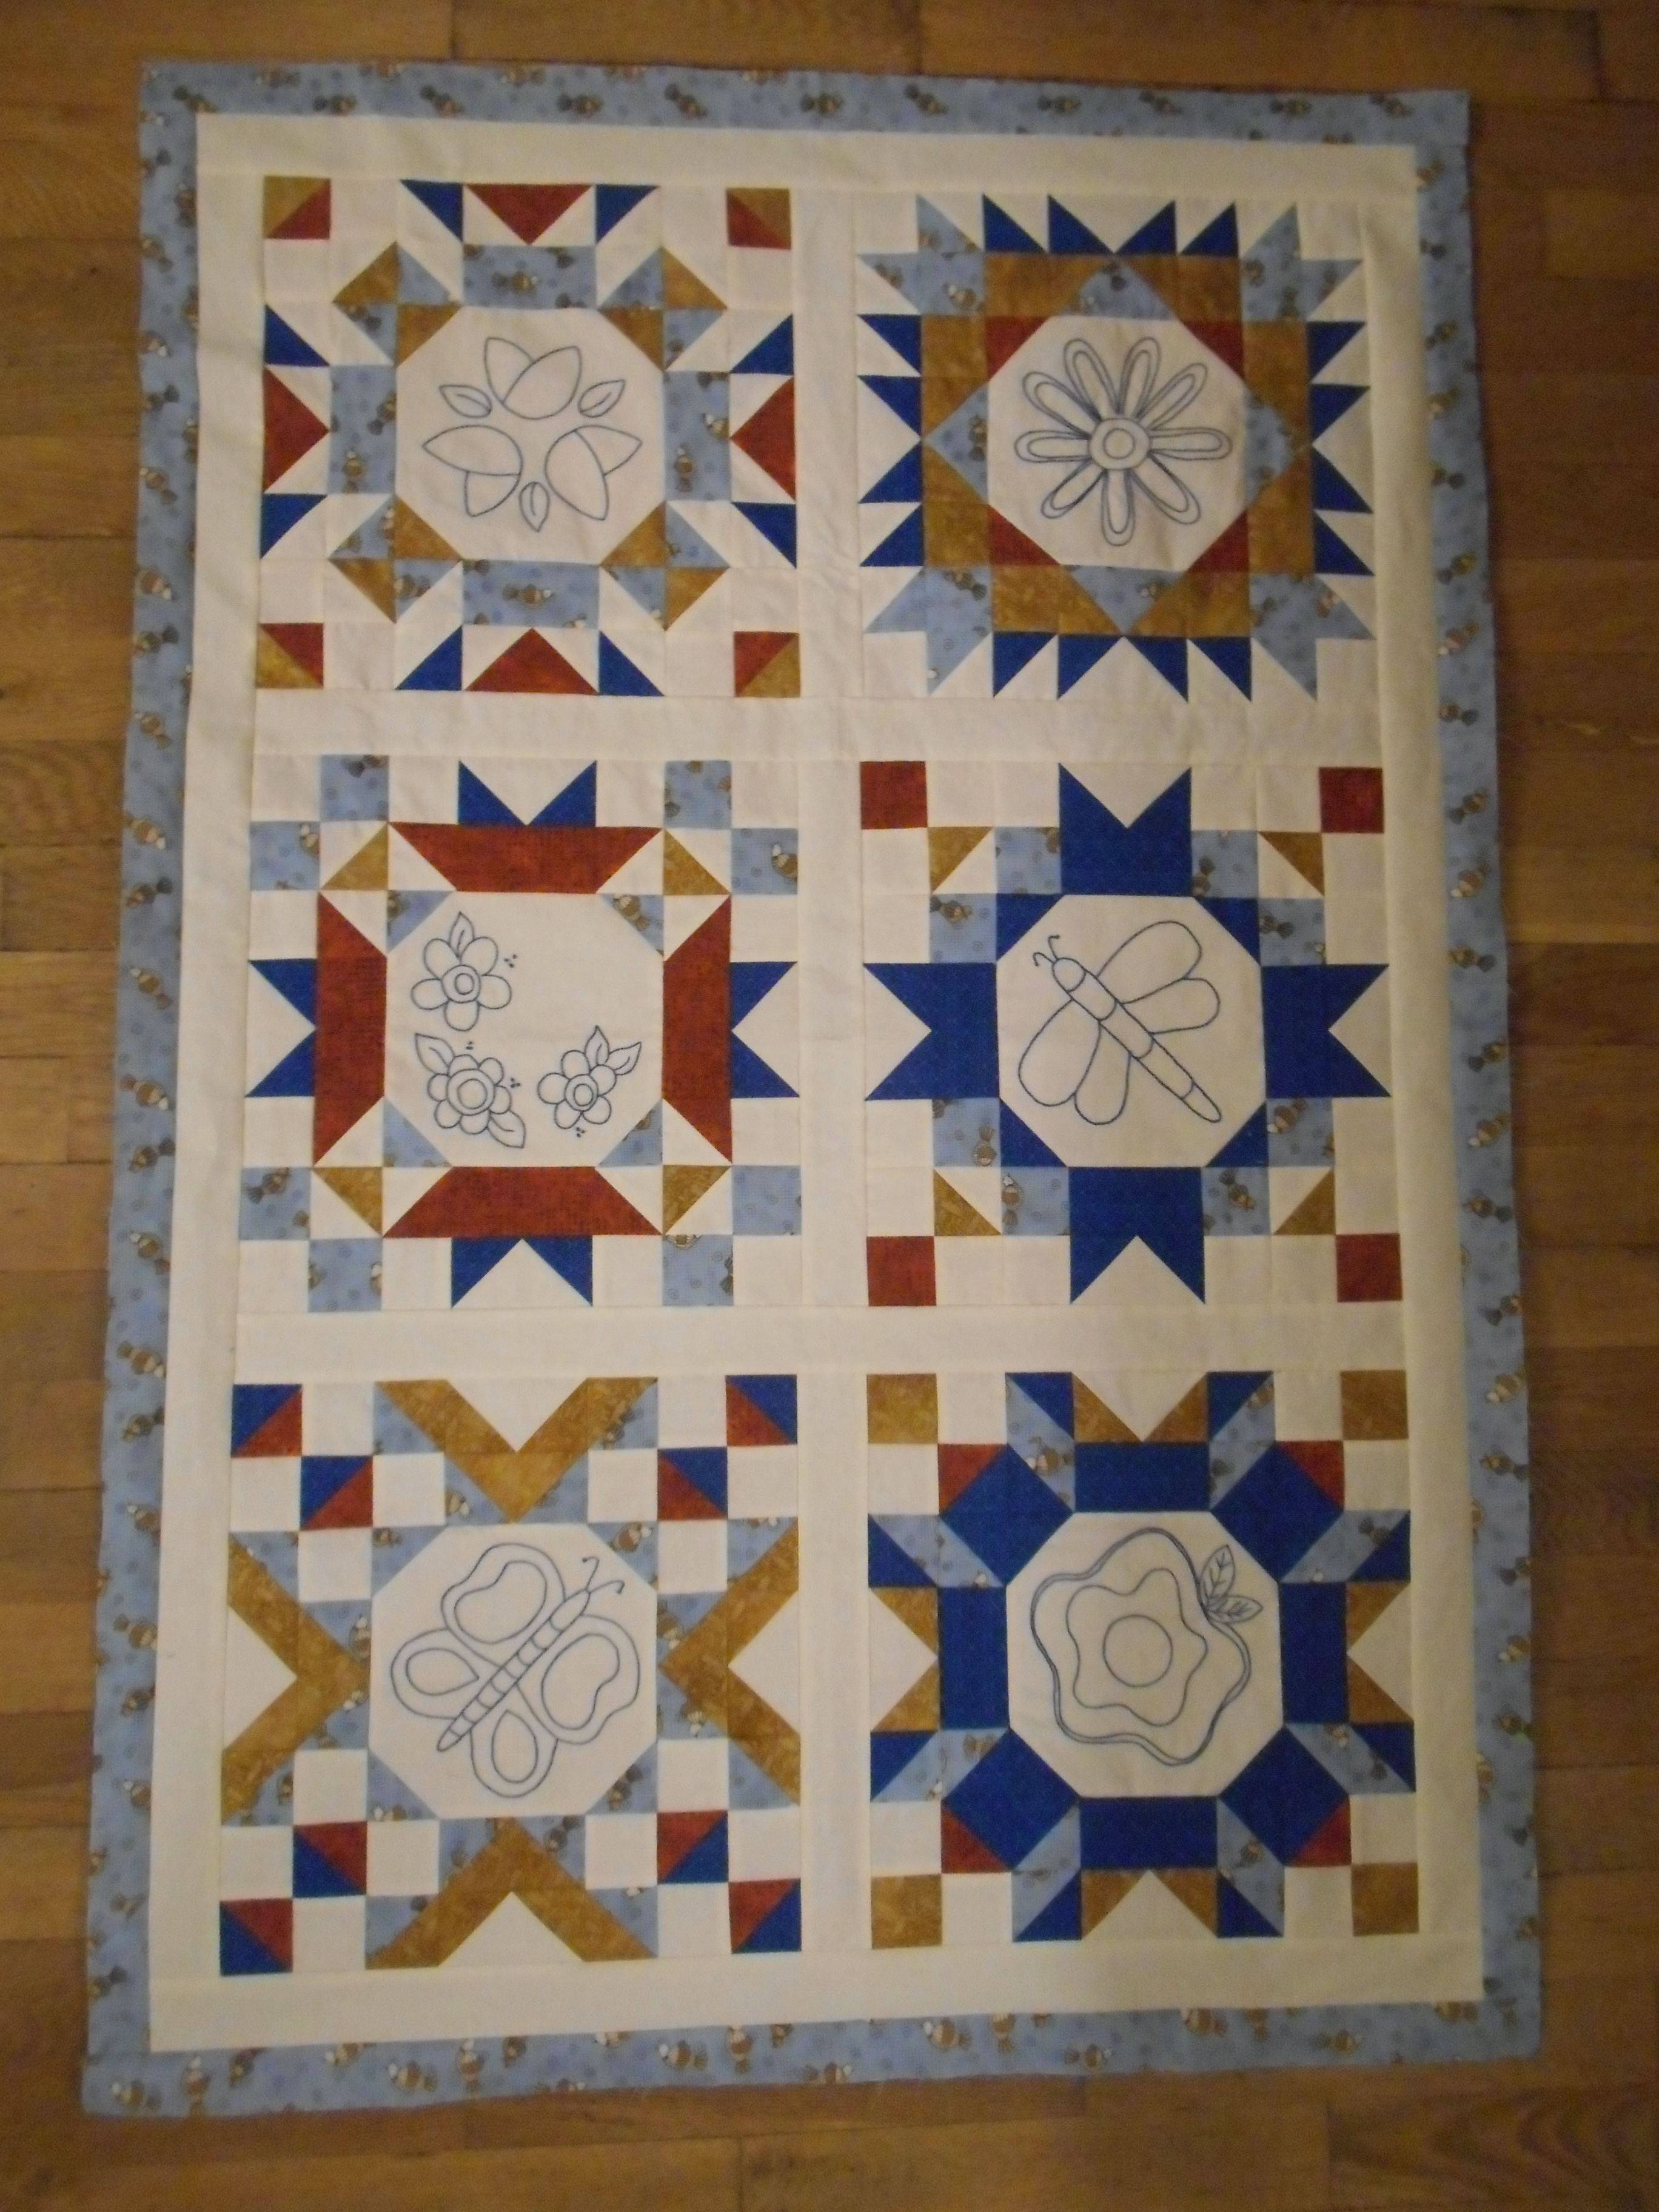
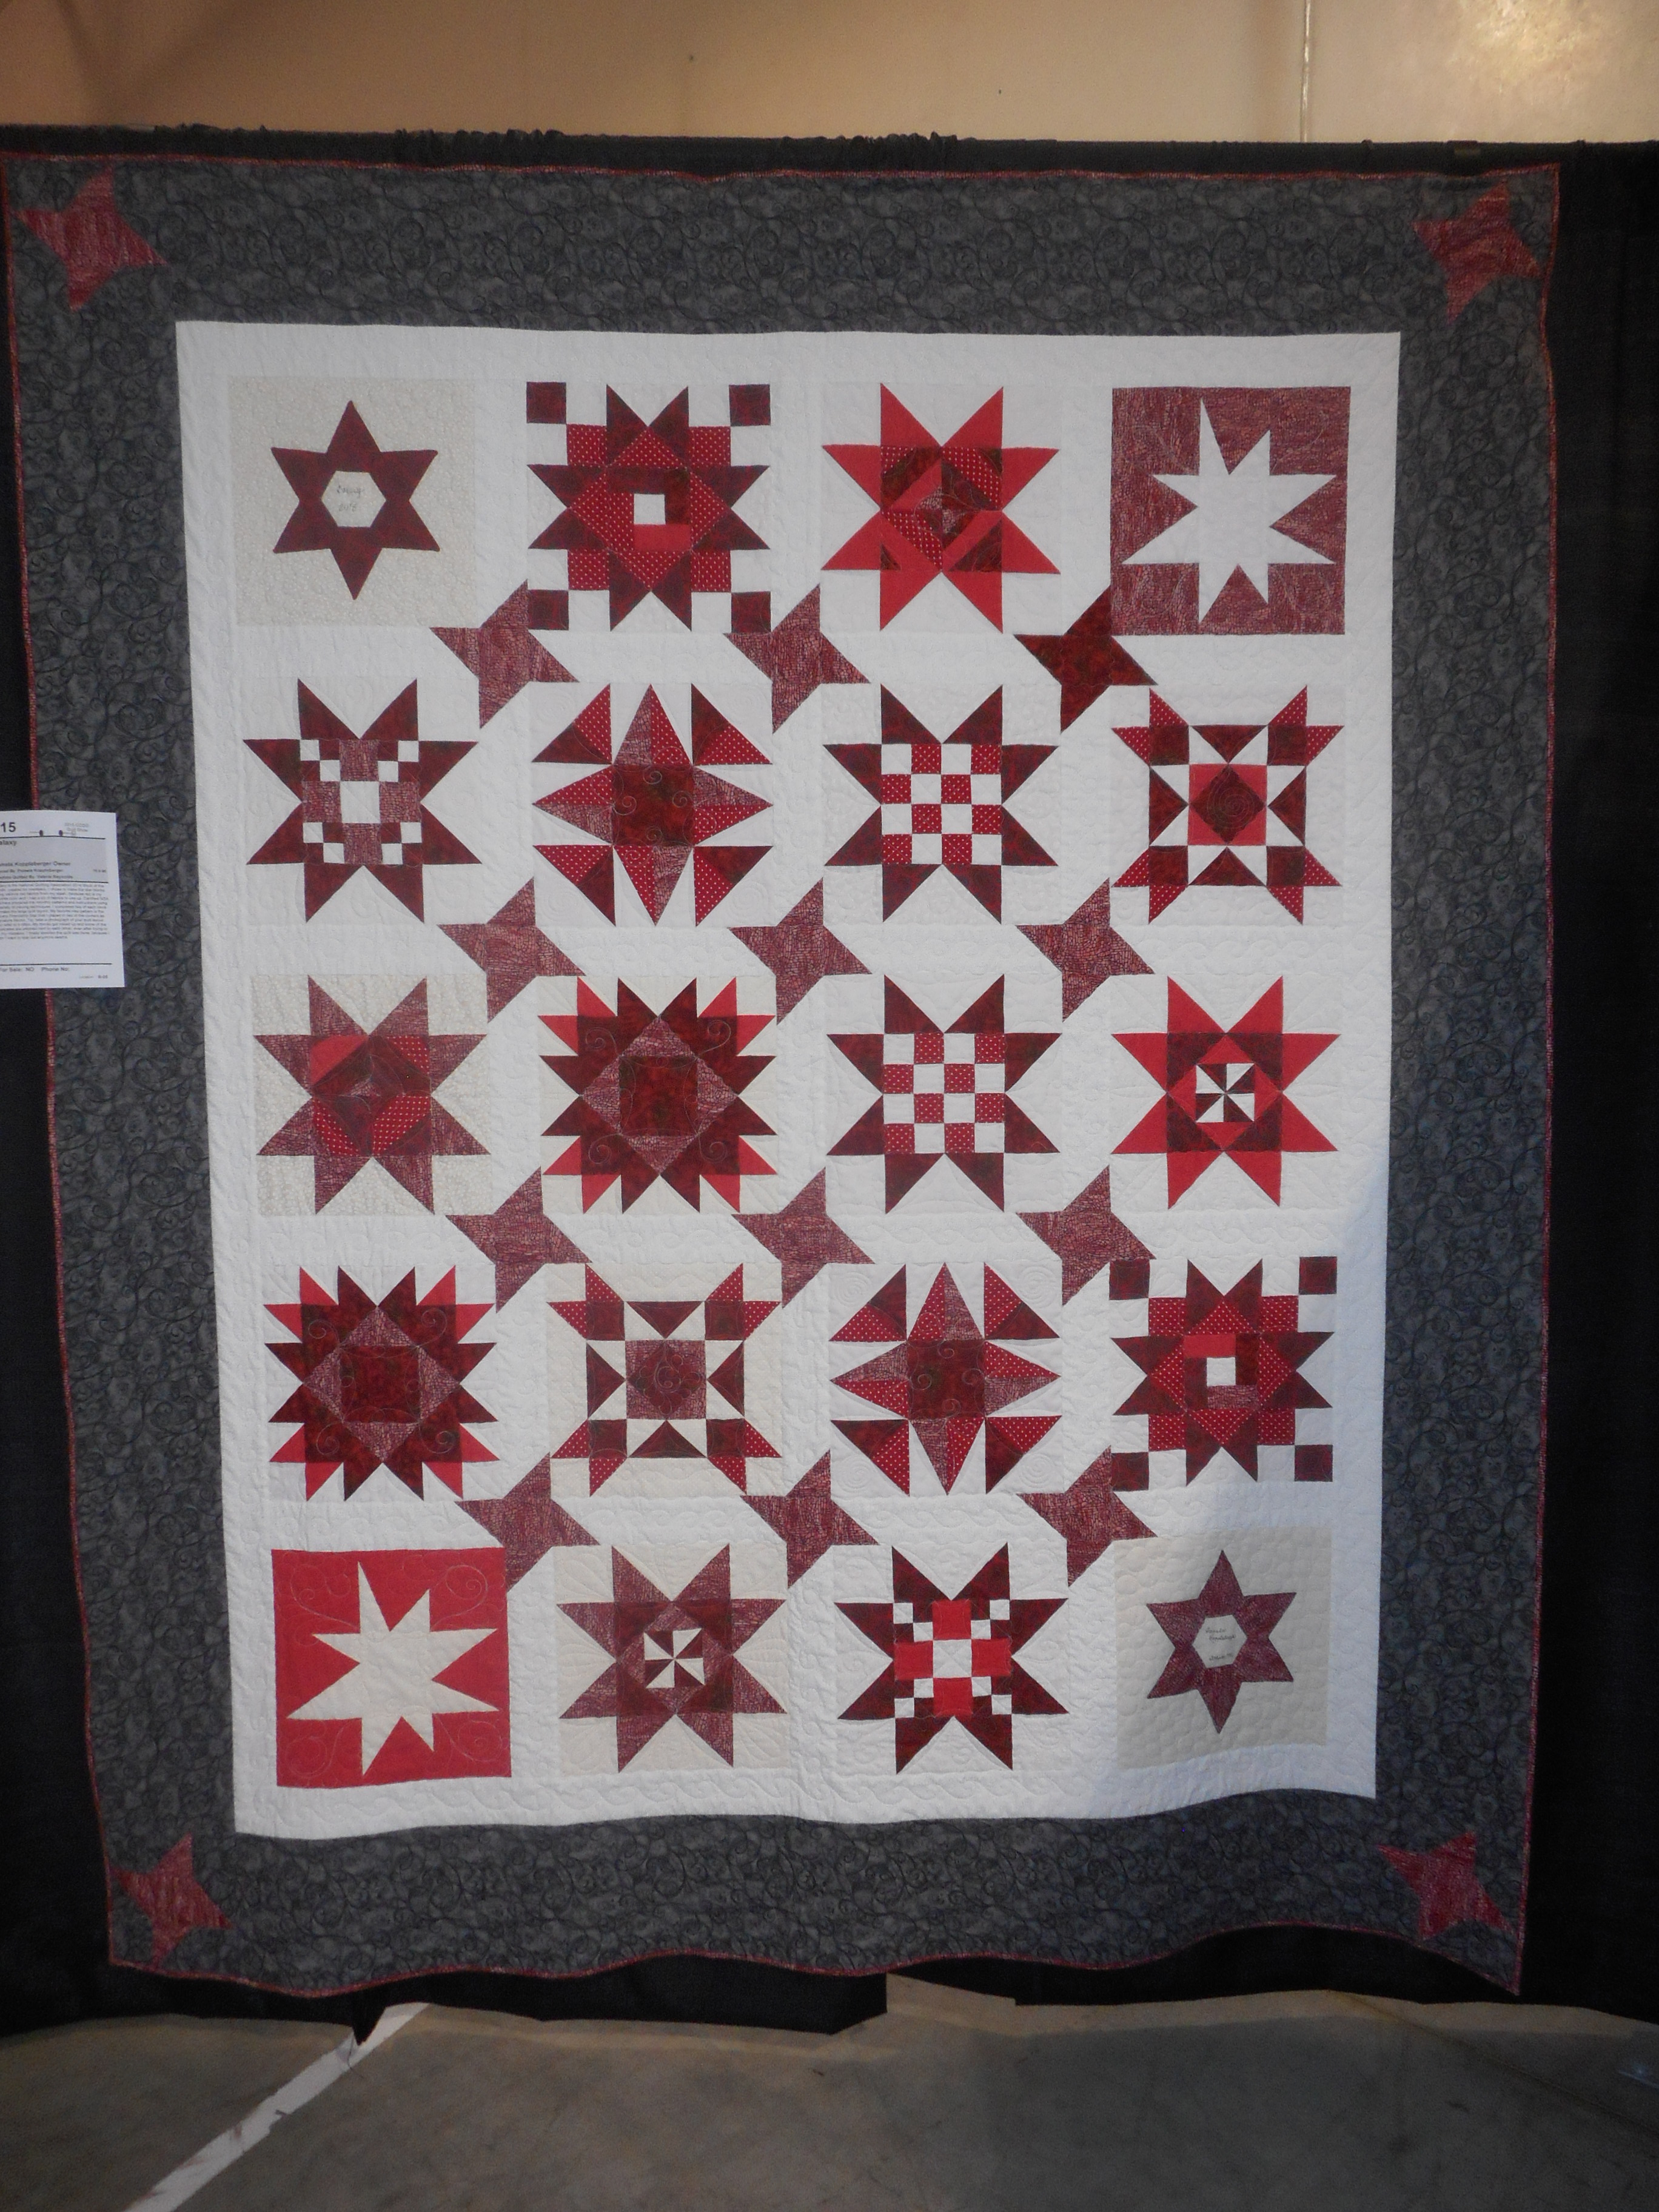
In January of this year, I finished piecing the quilt. I had hoped to mark the anniversary of Shana’s passing with the finished quilt, but it would not be. The quilt was now over 100 inches on all sides, having to add two extra horizontal rows to accommodate the last two signature blocks to balance the quilt.

Next, I pieced together the backing. I had purchased 9 yards of panda bear fabric in 2016 to make the quilt back. I had searched for fabric with panda bears to no avail. Then, while attending the baby shower for my nephew’s first child, they were presented with a baby quilt backed with panda bear fabric. The maker gave me the website where she purchased it. NOTE: Many of you are probably wondering why I was using panda bears on a wedding quilt. Well, my nephew’s nickname is Panda Bear. Now, four years later, I worried whether I would have enough fabric to make the backing.

Enter my long-armer, Rhonda. Because the quilt backing was so wide, she needed to place the quilt sideways on the long arm frame. I was able to piece the backing so the panda bears sat right side up. In March, off the quilt went to my long-armer.

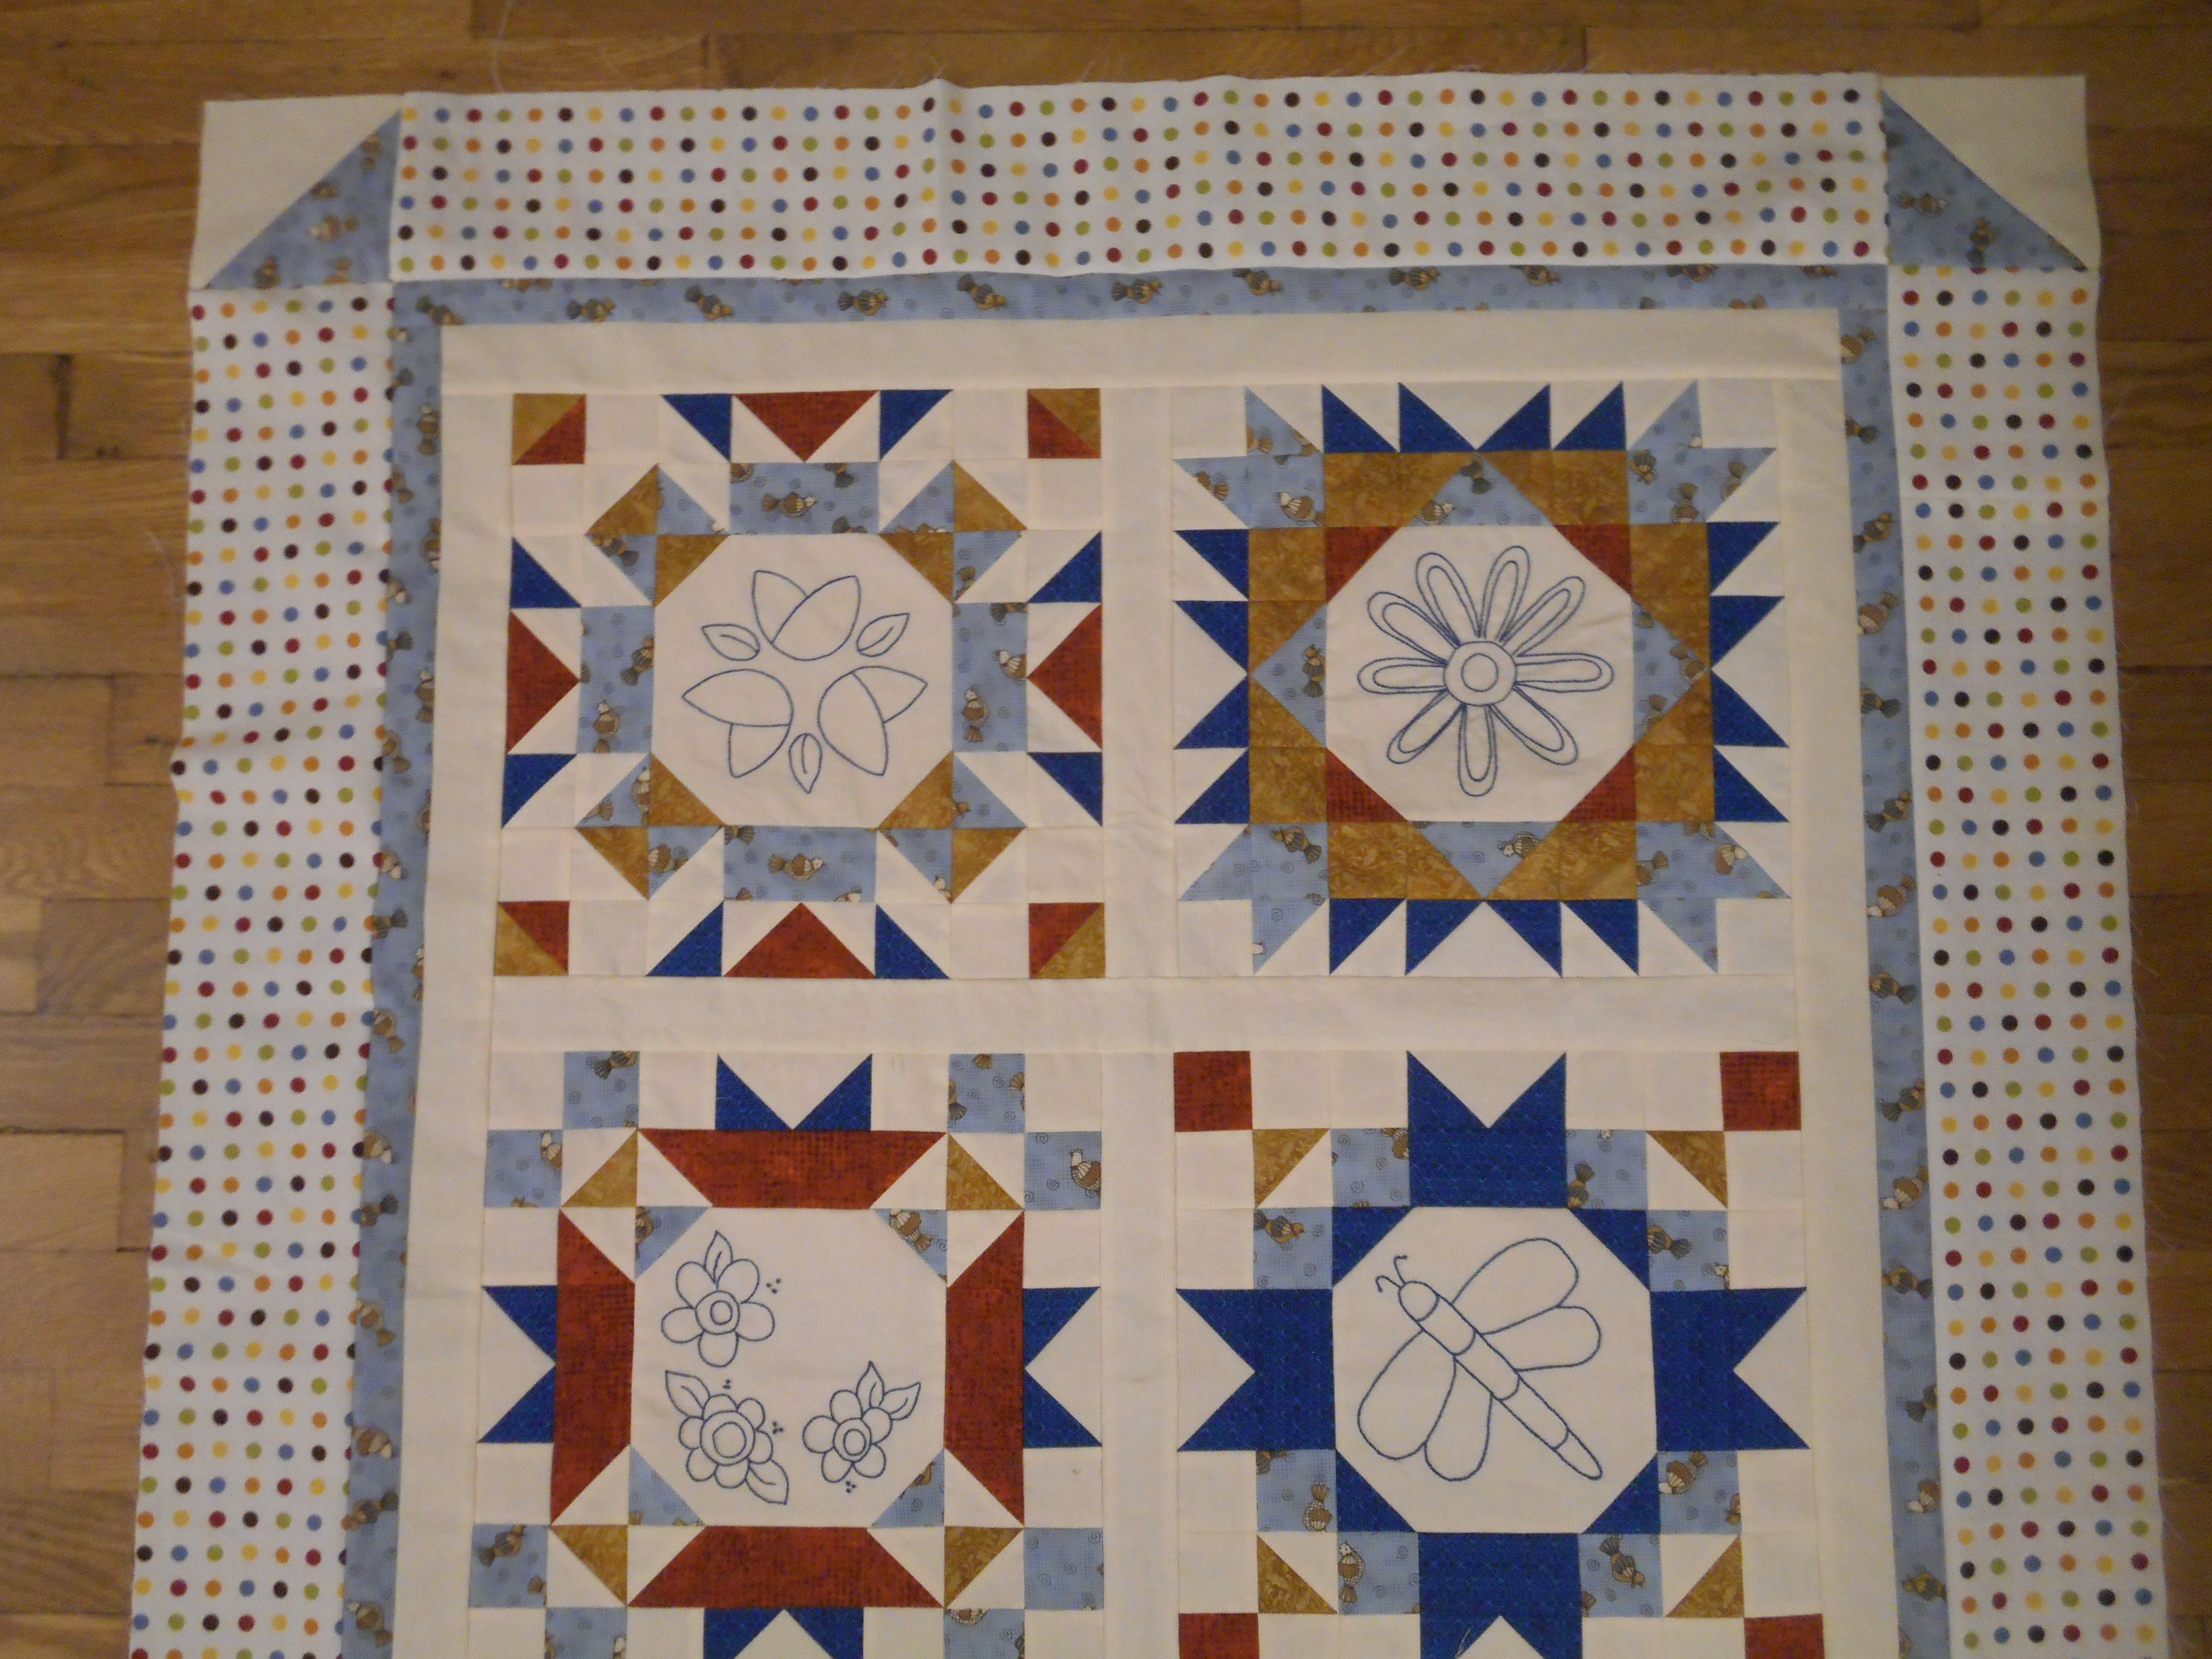
The quilt was bound in the same panda bear fabric and an extra quilt block with my own signature was added to the back for a label. I presented the quilt to my nephew & his wife on their 6th anniversary. I named it the Rench Wedding Album. I had the bride & groom sign blocks and placed the wedding date & church name into two of the blank blocks on the outside. A quilt to be treasured.

Rench Wedding Album quilt.

Applique & Quilting Progress

I am excited to write about my progress this week.  I have actually made headway on two of my current WIPs: the Craftsy applique class project and the Sew Sweet Simplicity quilt.

The star block was a quick applique, even with the sharp points.  Using freezer paper templates gives the edges crisp lines.  I was daring again and applied all the stitching to the star, then slit the back open to remove the freezer paper.  The bird was stitched down in a similar fashion, but required different preparation with the inside curve along the bird’s back.  The wing still needs stitched down, but will go quickly.

Star & Bird Blocks

These simple shapes are so fun & easy to applique.  I really love these fabrics, too. I did some auditioning of the fabric to determine exactly where to position the star template and the bird wing template for cutting.  Both are cut from the same fabric in a different colorway.  I love how the center of the flower design gives definition to the shape.

I sat down to my Bernina on Saturday afternoon and started FMQ.  Again, I had done enough thinking about shapes and decided to just start stitching.  Ultimately, I quilted designs I hadn’t even thought to quilt.  I repeated the loops across the square sections like in the previous two blocks.  Then, I began adding curves from one point to the next, followed by organic swirls and radiating lines.  I looked for ways to quilt in a continuous line, creating some squiggles and stitch-in-the-ditch to move into the next corner section.

3 Flowers block quilting

Overall, I am satisfied with the quilting.  I have found that my quilting is not steady and I often cross over patches or my lines are not straight or do not curve smoothly.  I know that some of this is due to the shoulder surgery I had several years ago.  Prior to that, my quilting was smoother. I am beginning to accept the changes I see occurring in my quilting and just begin finishing quilt tops.  Some experienced quilters will likely state the mantra, it’ll get better the more you practice.  Sorry, but I can only quilt in small sessions.  The longer I quilt the more unsteady my movements.  This square was all I could complete on Saturday.

I am overcoming my obstacles to finishing projects.  One of those obstacles has been perfection.  Have you seen some of those prize winning quilts?  Check out this Judge’s Choice from AQS Paducah by Setsuko Matsushima of Japan.  This is awesome!  These quilts set the bar too high and leave amateurs like myself frustrated with my projects. When did quilting become so competitive?  I want to enjoy my quilting again and that begins with accepting my work for what it is.  I hope to pick up more of those long forgotten projects and finish them, as I continue to accept where I am at and the outcomes I achieve.  They are uniquely me and that’s okay.

What project did you work on last week-end?  I’d love to hear about it.  Until next week…keep on stitching!

Life has a way…

Life has a way of getting in the way.  Just when everything is running along smoothly, something comes along to mess up the routine.  That’s when you just keep on living without worrying about life.  You go with the flow.  As they say in France, C‘est la vie!  I realized early last week there wouldn’t be an opportunity to write a blog post.  I also missed out on four days of Yoga with Adriene.  My body was functioning with less sleep than usual.  And, none of the things “getting in the way” had anything to do with quilting.

But, I am back writing this week, and I have some great photos to show of the FMQ I completed two weeks ago.  I quilted the center embroidered blocks in the Sew Sweet Simplicity quilt.  I started by echo quilting a line around the embroidery design, then filled in the remainder of the background area with stippling.  Then, I quilted organic designs inside the embroidery motifs to evenly fill the block centers with quilting stitches.  Here are photos of each block.

I prefer to bury my threads, so I spent a couple of nights last week watching my new favorite series on Netflix, The Doctor Blake Mysteries, while knotting and pulling the thread ends into the quilt sandwich.  The show is an Australian television drama that first aired 2/1/13.  Set in the late 1950’s in Ballarat, Victoria, Australia, where Dr. Lucien Blake solves crimes.  I recommend it to anyone that likes period dramas.

Here’s a look at the Sew Sweet Simplicity quilting to date.

All the quilted centers

Still lots of quilting to accomplish, so no expectations of finishing in time to enter in the AQS GR show.  There are other shows, so I will have to set a new deadline to keep me on track to finish this quilt.

Until next time…Happy quilting!

Weekly Progress

Progress: (noun) forward or onward movement toward a destination.

Do you recall hearing about the 1933 World’s Fair in Chicago with the theme of Century of Progress?  During the Great Depression, women from all over entered quilts into the largest contest ever held.  Fast forward to 2017 and women all over are entering quilts into contests.  The competition is stiff.  I recently received my AQ magazine with winners from the Daytona Beach QuiltWeek.  Fabulous quilts. The piecing, quilting, and artistry are just amazing.

So, why would someone like me consider entering a quilt into such a contest?  Not everyone will win and I hardly expect to take home a prize.  But, there is just something about sharing quilts, at all levels.  My progress towards entering a quilt into an AQS contest is slow, but I did begin the machine quilting, stitching in the ditch around the blocks.  I will need to step up my quilting over the next two weeks, if I expect to finish in time to enter in the GR show.  Here’s my quilting area setup.

Quilting setup

For those that read last week’s post on my Singer sewing machines, you may have wondered why I didn’t show a pic of my Bernina.  Well, here it is.  I purchased it in 2004, so it’s an older model.  But, I love using it.  Below are the blocks that I began stitching around.  Not much to see.  And, I continue to toss around ideas in my head about how to quilt the blocks.

Anchor quilting around blocks

I also made progress on my applique project.  I finished the Teacup block, pictured here with the only other finished block, Hearts.

Teacup & Heart blocks

I love the teacup fabric and the coordinating orange heart fabric.  These two fabrics, plus the large heart fabric, are from the Passport collection by Weeks Ringle over at Modern Quilt Studio.  I picked up a fat quarter bundle from her booth at an AQS show.  I finally decided to dip into the stash and use them in this quilt.

So, I am moving forward toward my destination of finishing my quilts.

Until next week…Happy Stitching!


a Little of This & a Little of That

This week has been very productive.  Early in the week I found time to hand quilt on the improvisational solids quilt.  I appliqued a few more hearts on blocks for the Craftsy class project.  The Sky Rocket blotto block is complete, although the dimensions are not accurate, but I am glad to have it done and will not fret over it’s imperfections.

sky-rocket-blotto-block

Saturday, I attended an event at my LQS with my sister.  The shop held a Baby Gathering event and offered several ideas and patterns for baby items.  Of course, as a grandma, I couldn’t walk away without purchasing a kit to make something for one of my new grandsons.

But, my biggest accomplishment was basting my Sew Sweet Simplicity quilt top, a BOM by blogger Jacquelynne Steves over at The Art of Home.  For smaller quilts, I like to pin baste on my wooden floor.  I place the backing wrong side up on the floor and use painter’s tape to hold it in place.  I make certain that the backing is smooth and taunt.  Next, I add the batting.  I opened a new package of Warm & Natural for this quilt top, placed it on top of the backing, then trimmed it even with the painter’s tape using regular scissors.  Next, I folded the quilt top into quarters and centered it on top of the batting, unfolding it and smoothing it into place.   The photos below show the flow of this process.

Lastly, straddling the quilt, I place safety pins over the quilt top, every 3-5 inches around the blocks and along the borders.  I decided to snap a photo of the quilt outside in the sunshine today.  January was so dreary in Michigan, but the last couple of weeks have been wonderful.  The natural light brightens the colors showcased in the quilt top.

pin-basted-quilt3

Now my quilt is ready to for machine quilting, which I’ll complete on my Bernina.  I am contemplating the designs I will use on the quilt to highlight the embroidery and fill the borders.  My goal for this quilt is a finish in time to send an entry into the AQS Grand Rapids quilt show, deadline April 21st, so I will be doing a lot of quilting over the next month.

Well, that’s my weekly update showing progress on my quilting projects. Hopefully you have been able to find time for stitching, too.

Until next time…

Borders, Granddaughters & Hand Quilting

This weekly progress update has multiple topics.  My goal was to complete the borders on a BOM begun about 1-1/2 years ago.  Although, I would like to say that I met my goal, I was only able to complete 3 of 4 borders.  But, I also spent time doing something crafty with each of my granddaughters, and made progress on a project that wasn’t even on my radar.

Mid-week, I put the first border on my Sew Sweet Simplicity quilt.  The pattern is by Jacquelynne Steves over at The Art of Home.  My older sister & I planned to do this project together.  The block options included applique or embroidery, and I chose to embroider.  The first border is the cream fabric used as the background fabric and the sashing.  This framed the blocks, making the fabric colors and embroidery stand out.  By Friday, I was able to add the second border of blue bird fabric.

2nd-border

Both of my granddaughters spent time with me this week-end doing a crafty project.  I planned a Saturday morning sewing lesson for 8-year-old Emma that included a trip to the local dime store to purchase items for her personal sewing box, practicing straight line stitching on striped fabric, and teaching embroidery stem stitching.  Her first project is to make a pin cushion, which has embroidered hearts.  Her nearly 5-year old sister Carly, spent time with Grandma on Sunday making a beaded turtle keychain kit.

In between, I added the third border to my quilt.  The dot fabric was purchased off the Hobby Lobby clearance rack.  I love dotty fabric and couldn’t pass by this purchase, only realizing after I got it home, that it is a perfect match to the fabrics in my quilt.  Bonus: I have enough to do the backing.

closeup-of-blocks

Being Grandma is lots of fun, but tiring.  Carly is a bowl full of energy.  I spent the remainder of the week-end on the sofa.  I picked up a hand quilting project in the vicinity of my resting place and added some stitches to the project.  My Solids Liberated Improv is from a Gwen Marston quilt retreat in 2009.

solids-improv-hand-quilting

So, that’s what I accomplished last week.  How about you; what projects have you been stitching on?  Join me this year in finishing up all those projects you’ve started.  I’m trying to learn persistence and determination with my UFO’s.  Just a little every week and, as the saying goes, “slow and steady wins the race”.

Happy Stitching!


Accountability to the Blogosphere

So, we meet again on the pages of my blog.  I said I would be here, so I needed to show up.  I made myself accountable to you all.  Hopefully, you showed up again too.

And, what have I accomplished?  I haven’t been lax, but quilting takes time.  I work a 40-hour per week job, so I have to find time in between everything else to do this craft that gives me such satisfaction.  And, you do to, with whatever you like to make with your hands.

The scalloped-edge binding wasn’t difficult.  I say this as an experienced sewist, but really, if you’ve successfully put a binding on a quilt, stitching a scalloped edge is doable.  Note: I use the word sewist because I like how it sounds, even though Merriam-Webster doesn’t recognize it.checkerboard-edge-treatment
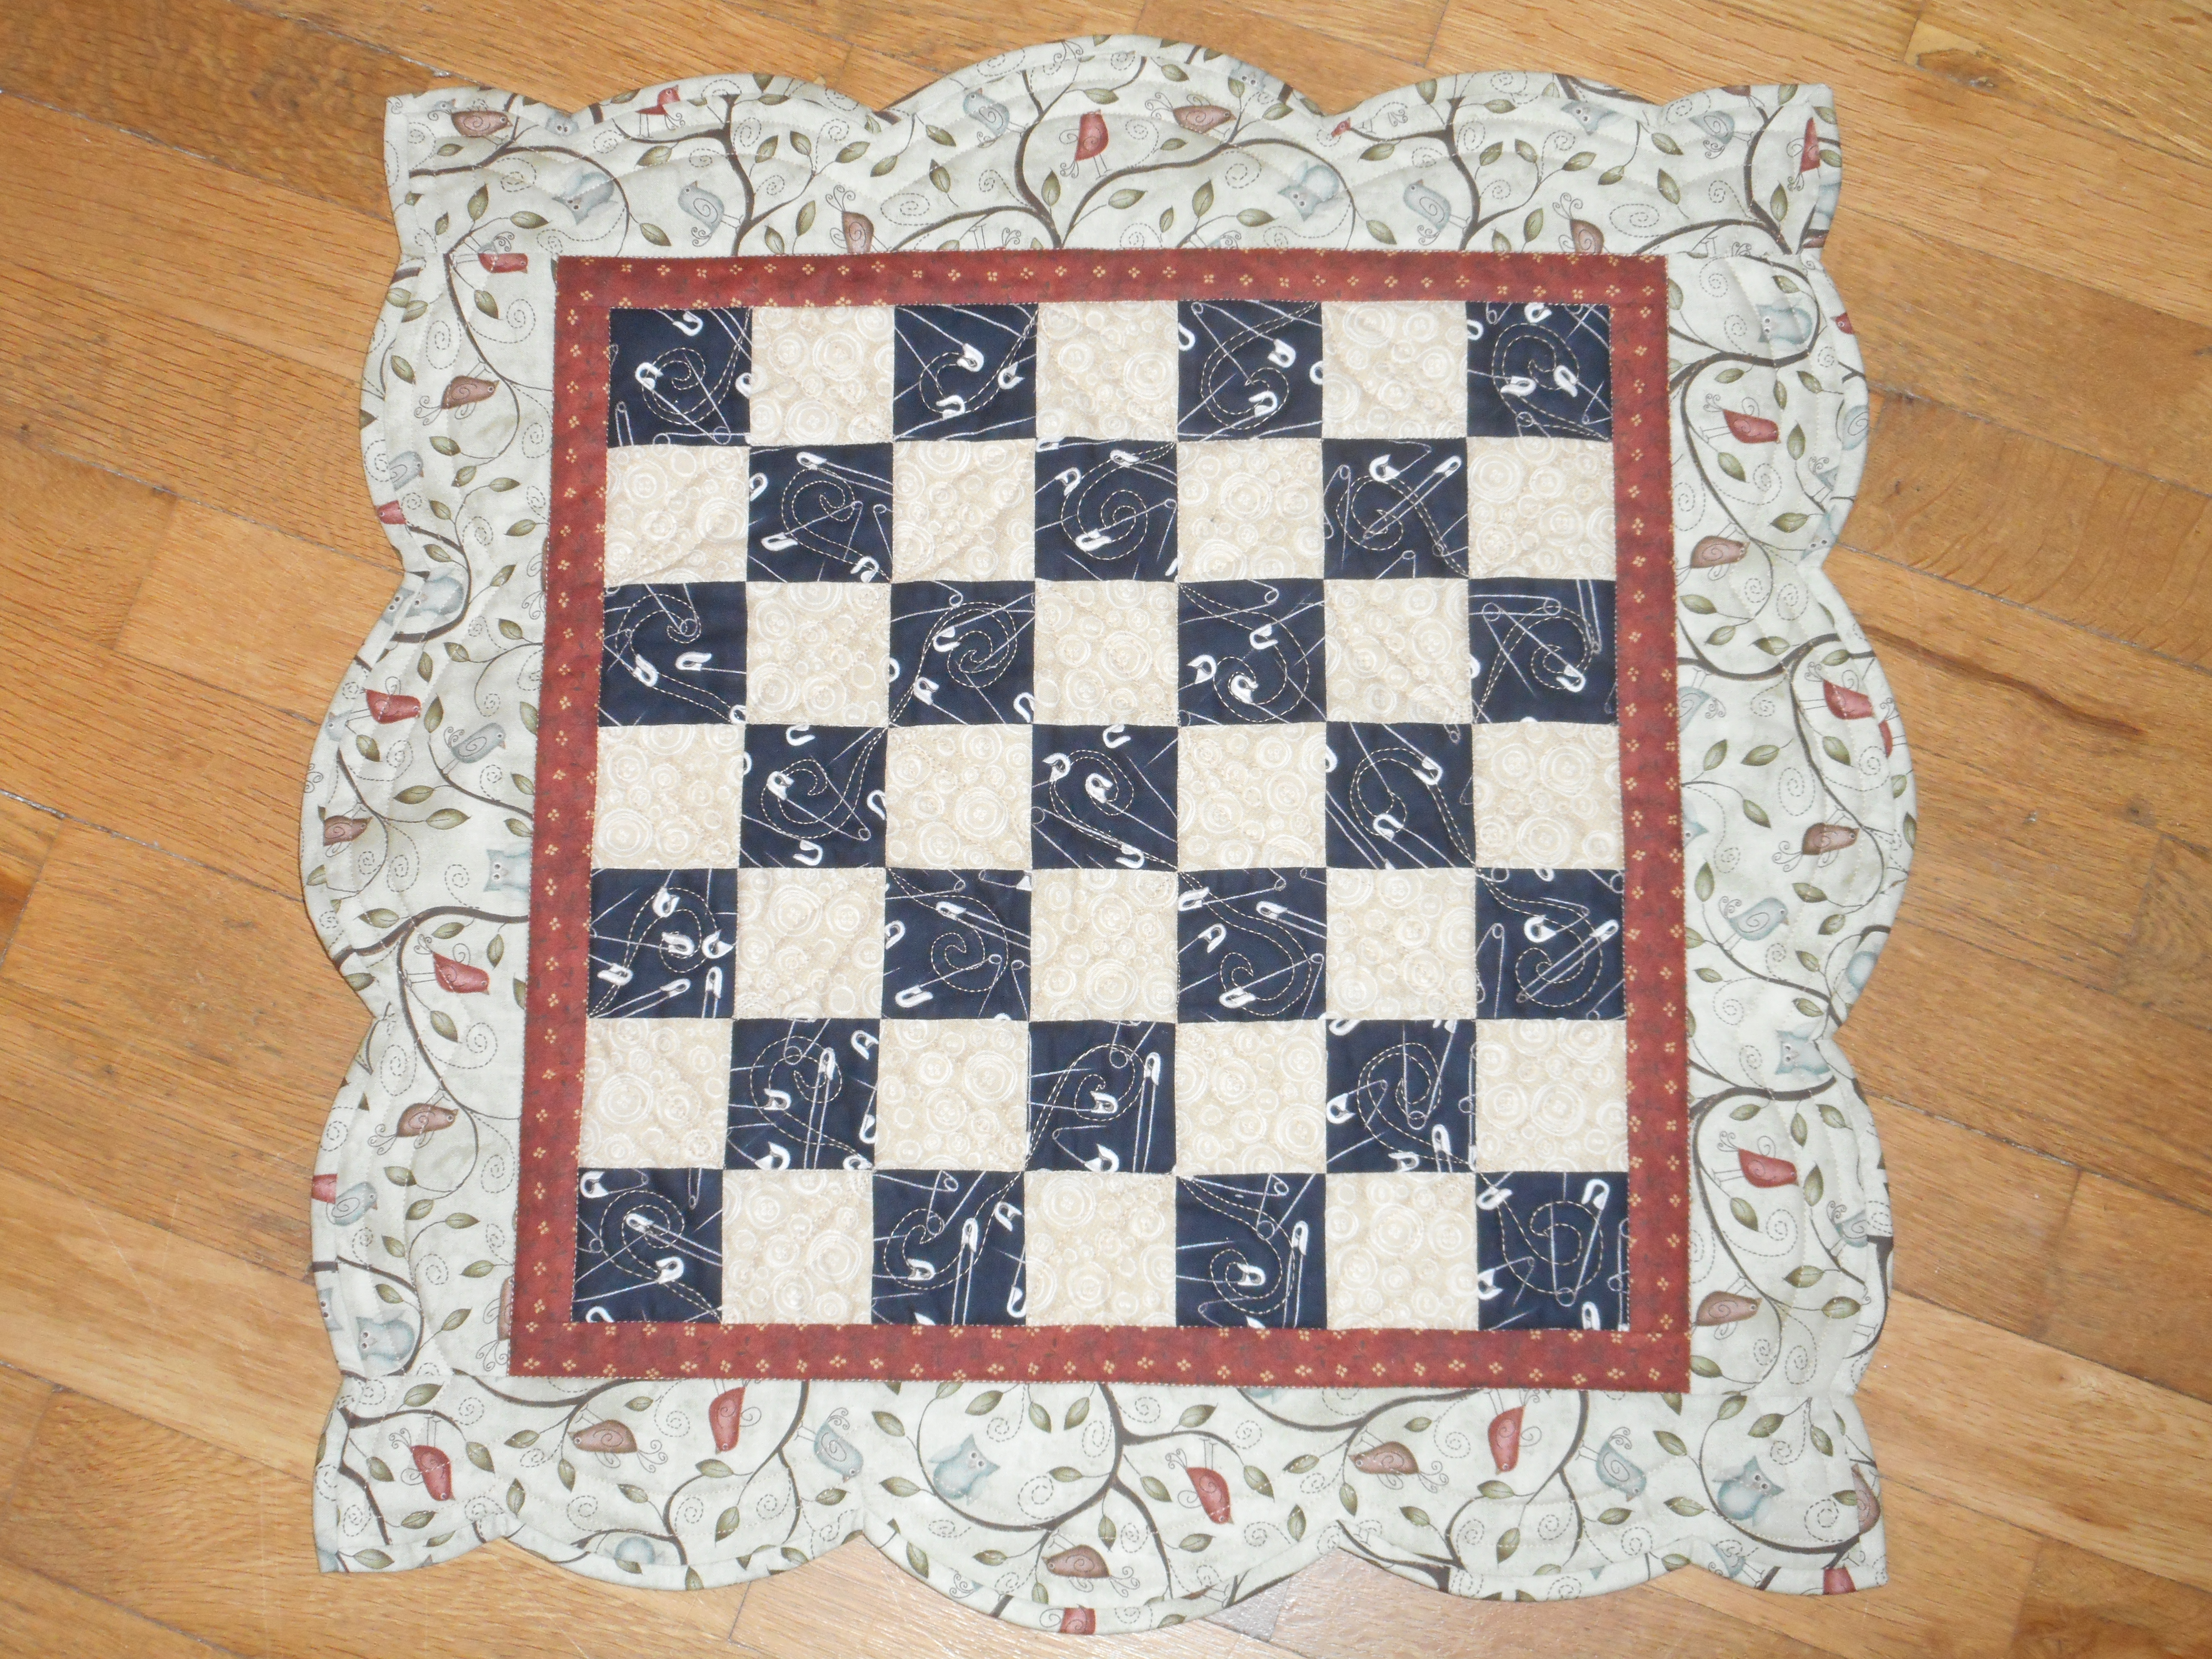
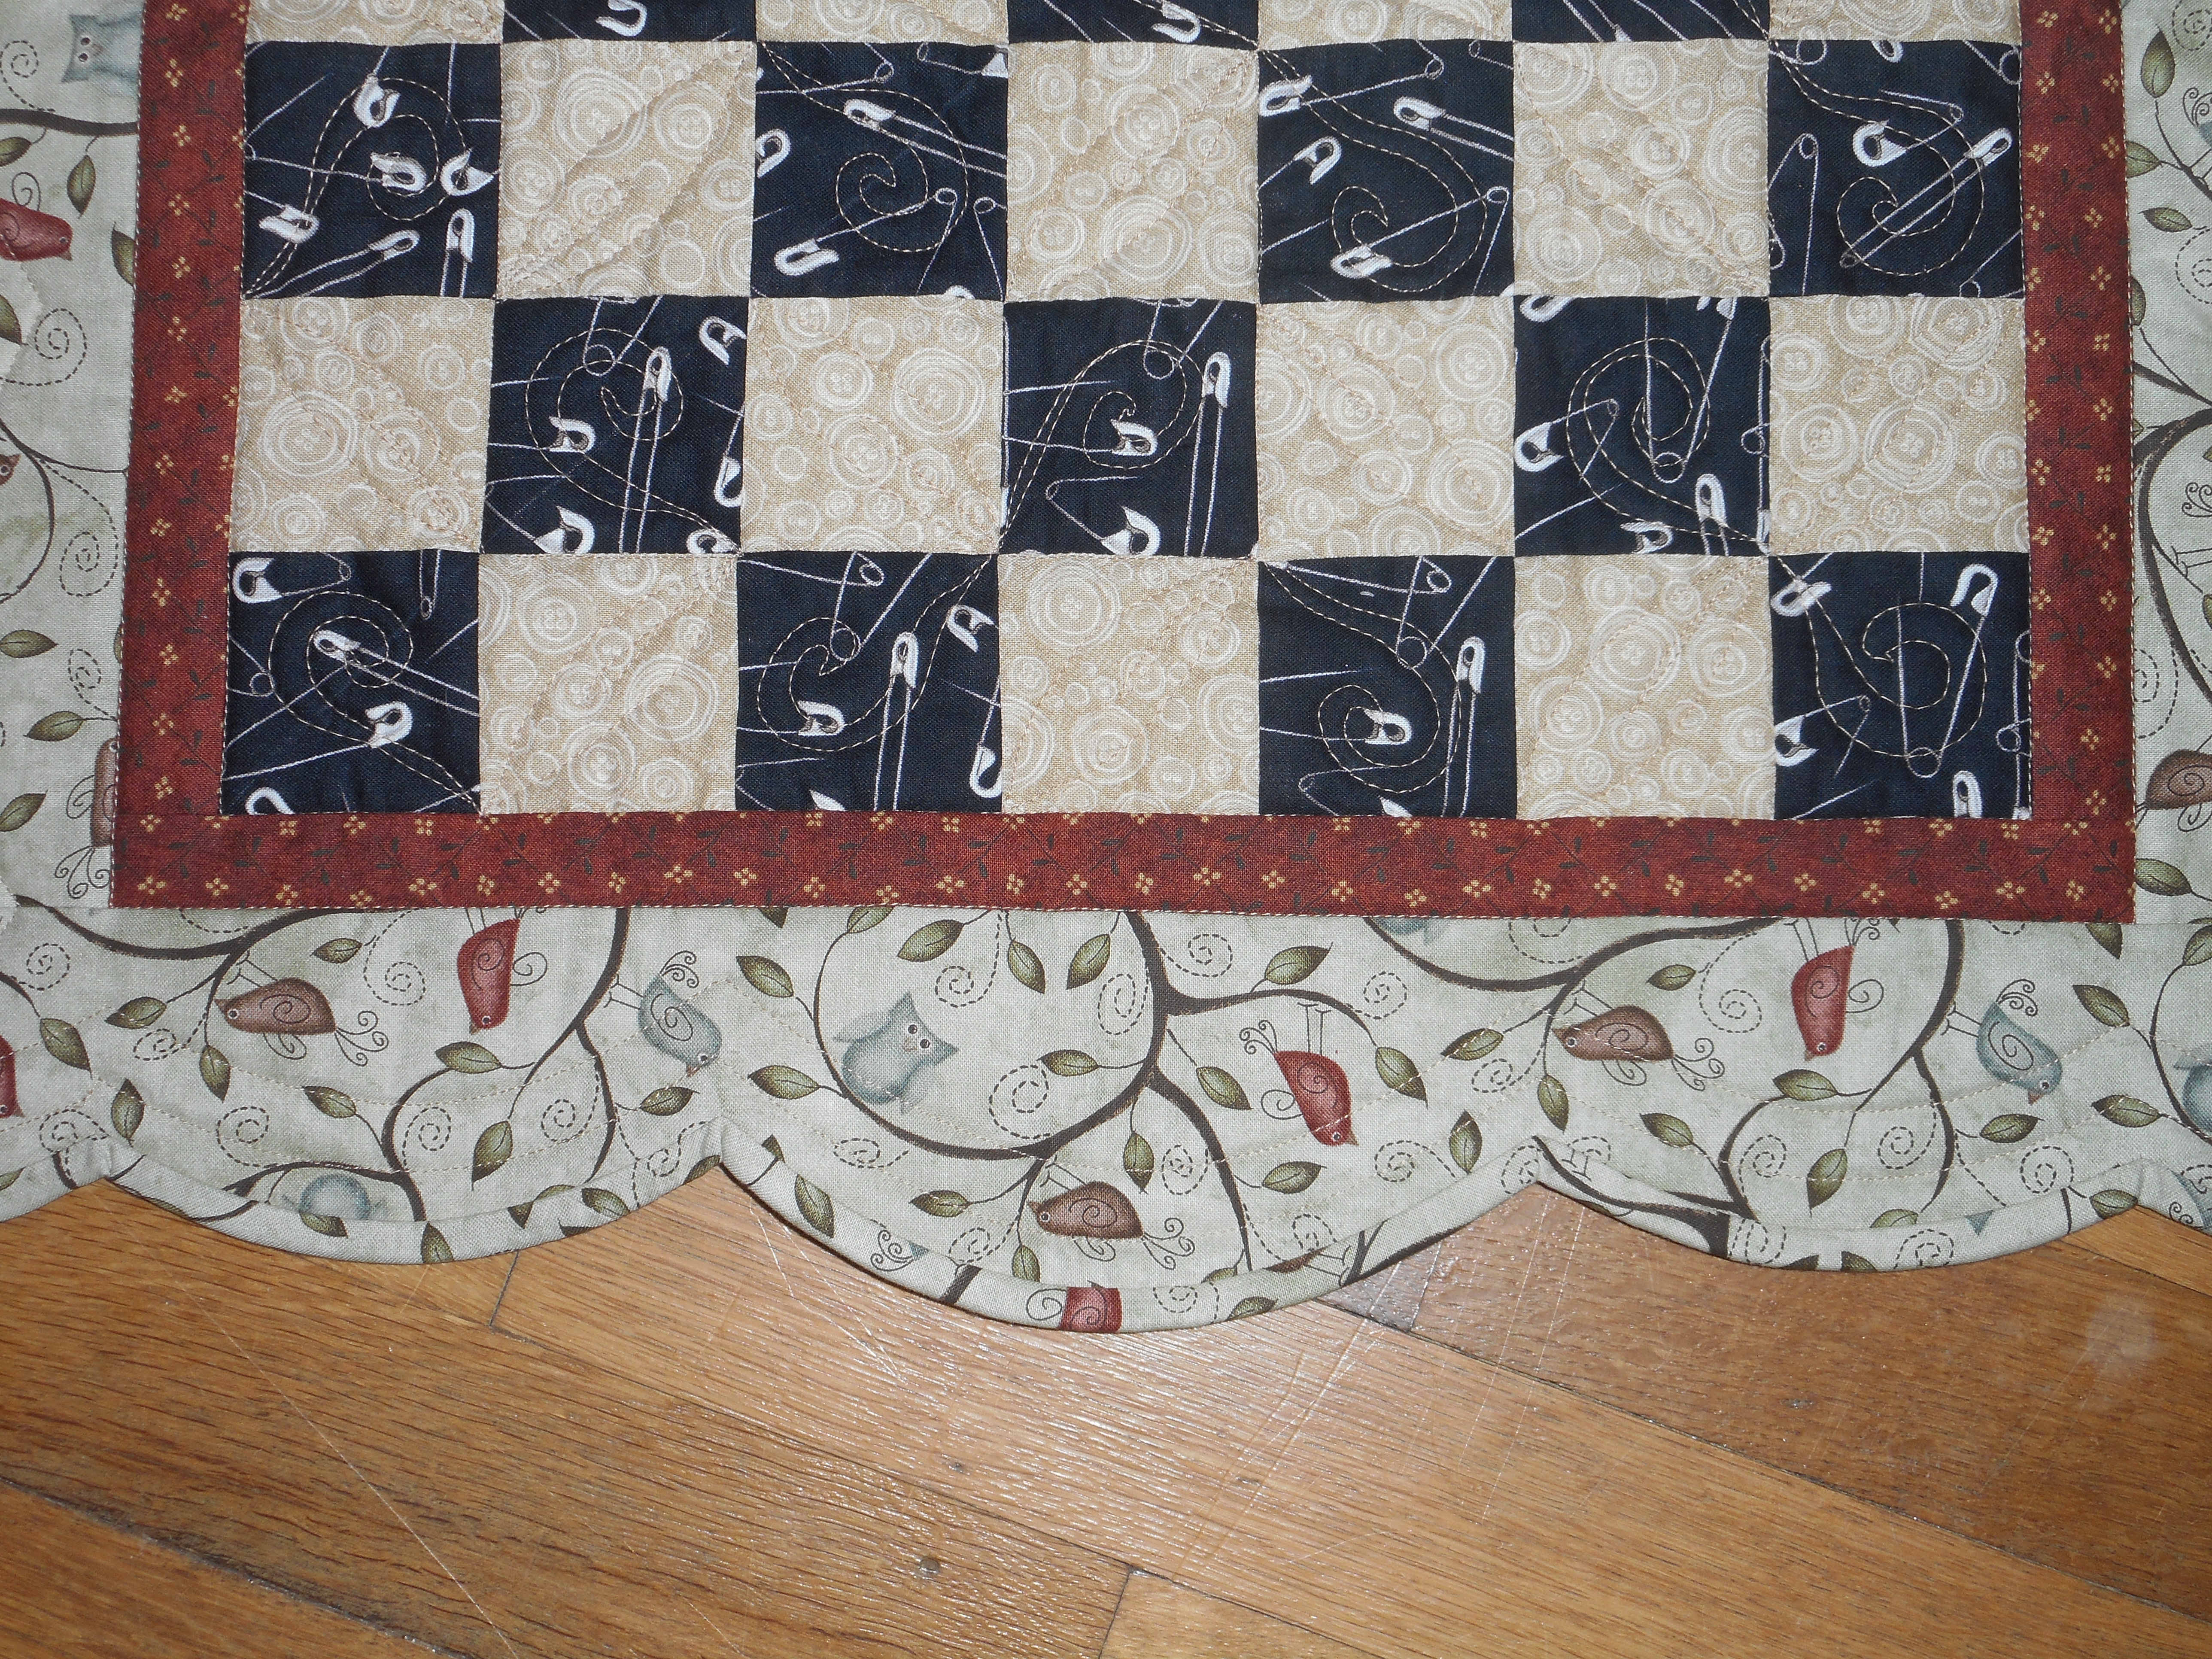
I chose to make the binding single-fold.  For those that don’t know quilting terminology, that just means one layer of fabric wrapped around the edge of the quilt instead of a double layer.  With this small table topper, it seemed to make sense, but ultimately it made for an easier binding.
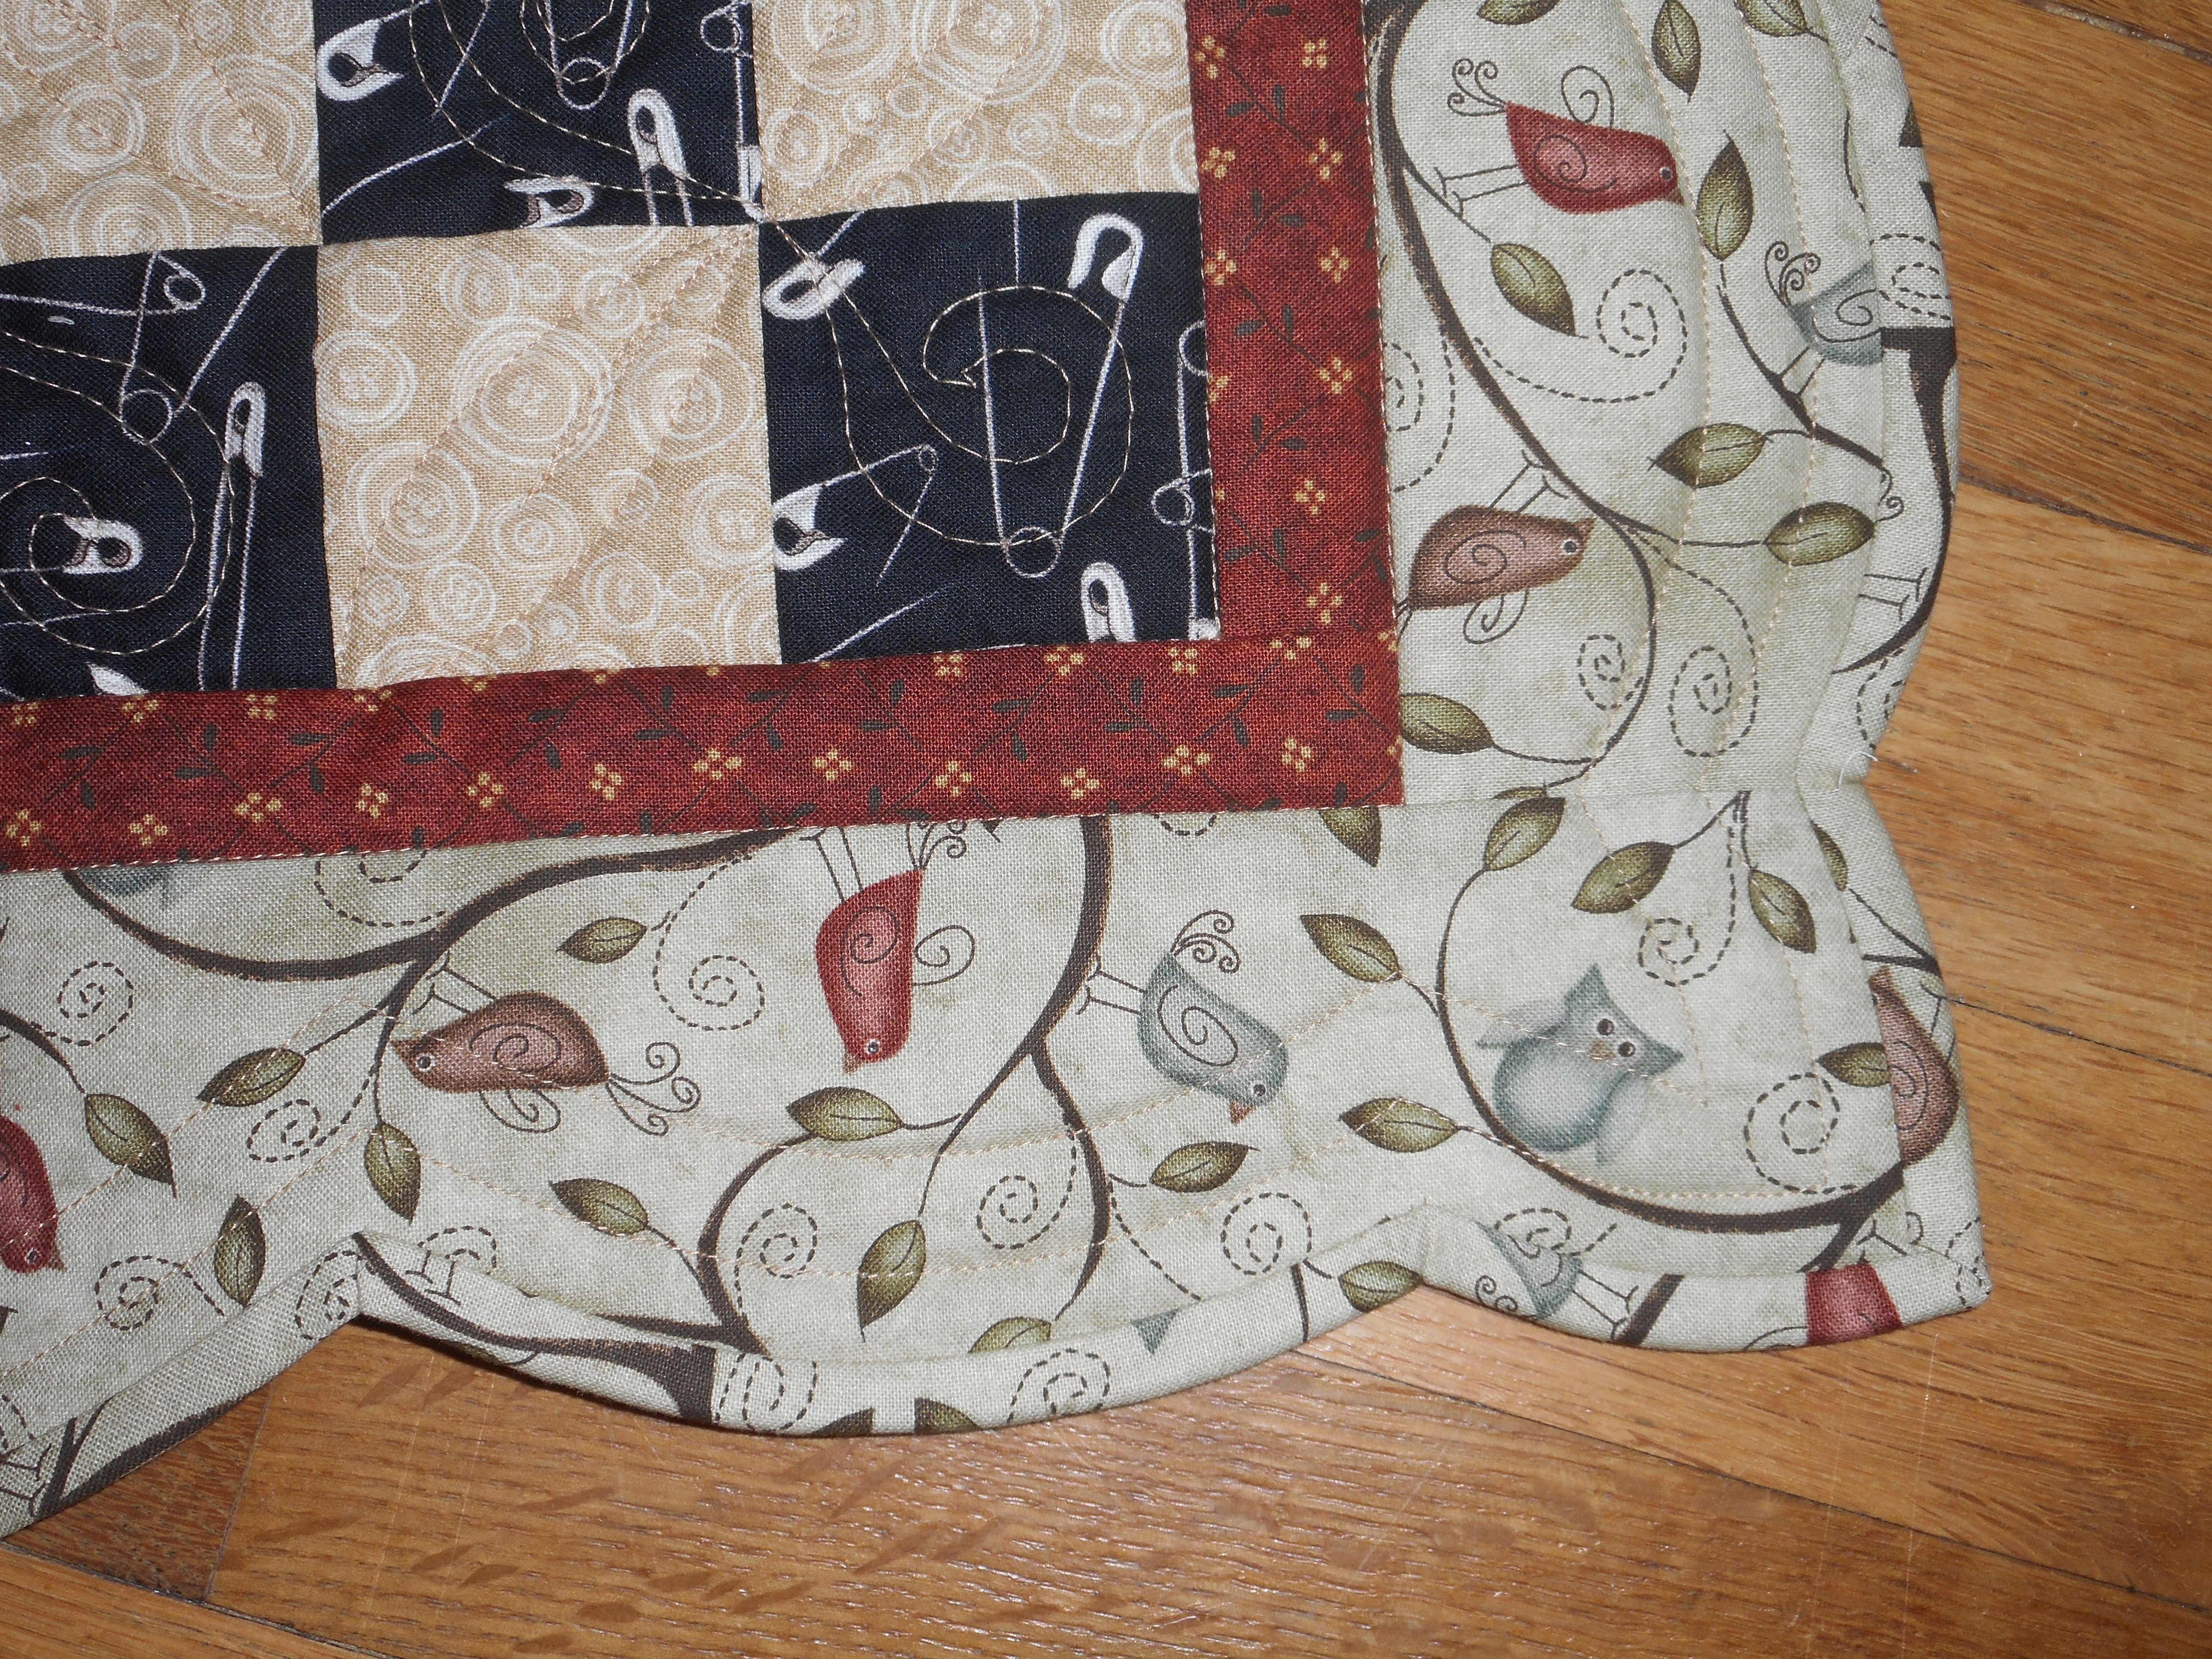
To make a single-fold binding, fold your strip in half with wrong sides together; press.  Open up the fabric and fold each edge in to meet the center crease and press again.  Fold together on the first fold line and you have the binding.  I like to give it another good pressing to make the folds crisp.  Don’t use a walking foot to attach the binding to the edge of the quilt.  I just used my 1/4″ foot because it was easier to maneuver, and I could see the edge of the quilt.  To stitch, open out binding and lay along front edge of quilt.  Stitch a 1/4″ seam, which will be along the first fold line.  When the binding is attached, turn it to the back and it will fold over the edge perfectly.  I started with a 1-1/4″ strip of bias fabric, choosing to use the border print for non-contrast.

checkerboard-table-topper-corner

The corners were turned just like you traditionally would, while the scalloped points were stitched by pivoting the foot at each turn.  I also clipped into the scallop point, just  through the thread on the initial seam line, before attaching.  Hopefully, my word pictures explain this process well enough that you could give it a try.  I love the finished project.

Image result for check mark symbol– one completed project off my checklist created by my 2017 blog posts.

checkerboard-table-topper-finished

Finished Checkerboard table topper

I also spent most of my Saturday afternoon working on a Craftsy class project.  It’s a basic hand applique class by Mimi Dietrich.  I’ll have to save progress on that project for next time.  Hopefully, you’ll meet up with me again next week and we’ll see what I’ve been up to with all those WIPs in boxes and bins in my sewing room.

Until then…Happy Stitching!

Not a New Year’s Project List

I make lists.  Lots of lists.  I’m the type of person that adds to a list just so I can cross it off the list.  I like to see that I completed something.  I like to look back at my lists and see what I accomplished.  At the beginning of each new year, I like to create a list of the quilt projects I plan to finish.  Generally, the list gets longer and the finishes are fewer.  I seem to spend a lot of time creating lists and less time doing what’s on the list.

Last year, I didn’t make a list.  In fact, I haven’t been working off a written list all year.  Instead, I focused on my current project and worked on it until it was done, then I moved on to the next project.  In 2016, I completed 3 baby quilts and 1 queen size quilt, from start to finish.  I made progress on several other projects.  I also stitched up several items for my grandchildren: baby burp cloths, baby bibs, baby blankets, doll clothes, and lined curtain panels.  I also didn’t post much on my blog.  Seems I get more done when I stitch and avoid the blogosphere.

elephant-baby-blanket

Flannel elephant fabric with comfy gray fabric on back and satin blanket binding with heart stitching – baby blanket for my next grandson we are patiently waiting to arrive.

Lately, I hear more & more quilters are trying to downsize their stashes and complete UFOs, WIPs, or whatever you call them.  I’ve been trying to do that, as well, but find myself obsessing about the particulars.  I can be a perfectionist.  But, I’ve decided I need to jump in and just do them.  I can’t take too long making a decision.  So, now that I have caught up on current projects, I decided to jump into a WIP and get it done.

I picked up a table topper I put together last September, from a kit I bought several years ago.  I bought the project so that I could try my hand at a scalloped edge treatment.  I spray basted the top, batting & backing together and started quilting.  After stitching around an inner border with a walking foot, I started free motion quilting organic designs.  In no time, the topper was finished.  I marked the scalloped edge, stitched the line, and trimmed away the fabric edge.  A couple rows of echo quilting along the scalloped edge and I’m ready for the binding.

Well, I’m feeling pretty satisfied with my progress and excited to have a finish in sight.  Makes me want to pull out another project and get it done.  So, meet me back here next week and I’ll show you what I’ve accomplished.  And, maybe after several more weeks, I’ll begin to see a dent in those UFOs and WIPs.

Happy Stitching!


Nine Patch Baby Quilt

I finished another baby quilt.  This seems to be my forte.  Thinking about it, a baby quilt is what got me started in quilting.  And I’ve made more baby quilts than any other quilted project over the last 30+ years as a quilter.  This particular quilt is for my nephew and wife, who are expecting their first child.

As quilts go, I like the scrappy ones a lot.  This one is made from several 9-patch blocks I’ve made while working on other quilt projects.  I will take scraps from projects, such as jelly roll strips or other small pieces, and cut them into 2-1/2 inch squares.  Then, I use lights and darks to make a 9-patch block.  These are usually sewn together as beginners and enders while sewing other projects.

Nine Patch Baby Quilt

I also received several 9-patch blocks as a gift from guild members when I completed two terms as the guild president.  From this collection of nine patches, I selected several with children’s prints and flower designs.  I chose a yellow dot fabric to make alternating blocks in the center of the quilt.  Nine patches surround the center like a border.  You may notice that the blocks alternate with five dark patches in the outside corners and center patch with blocks that have four dark patches in the opposite locations.

9 patch lower right

I completed all the machine quilting on my Bernina.  The yellow dot blocks were quilted first with a meander.  The nine patches are quilted in the dark patches by stitching a curve from corner to corner.  By alternating the blocks, I was able to complete the quilting in a continuous motion from block to block.  The design also created a circle around the light patches.

9 patch upper corner

More quilting.  I really enjoyed making this quilt.  And, I found out yesterday that I have a niece that is expecting her first child.  So, I’ll have to add another baby quilt to my projects for the year.

I wasn’t away so long this time and have been steadily progressing on other projects that I hope to write about.  Next up, a wedding quilt for another niece.  I’m also following The Splendid Sampler.  Have you joined?  Some pics of those blocks may show up here, as well.

Until next time…happy stitching!

Finishes

I recently read a comment by a blogger that said, “I’m a quilter that blogs, not a blogger that quilts”.  I wholeheartedly agree.  And, for several months, I have been quilting and not blogging.

I found myself at my blog site today and decided to write a few words and post a few pictures of quilts that I have finished over the last 6-7 months.

DSCN1574

Galaxy, my NQA 2014 Block of the Month, was finished in time to display at my local quilt guild show in September 2015.  Some of you may know that the NQA has dissolved it’s organization.  I received a final member letter December 29, 2015, outlining some of the final steps taken by the board.  It is sad to see the organization go, but not surprising.

Medallion

Medallion is my entry into the Circa 1825 quilt challenge for the American Quilt Study Group.  I finished the quilt in July and it was displayed at the annual Seminar in September 2015.

Sugar & Spice Quilt finished

Sugar & Spice is a queen size quilt I began last summer and finished just before Thanksgiving.  It is a pattern from Joan Ford‘s book Cut the Scraps and uses her Scraptherapy method.  The quilt was finished for my niece and her new husband, who were married in October 2015.

I also finished have finishes for projects that I did not photograph, but some of you may have followed the progress on my blog.  I completed two Feather Tree Advent calendars for each of my daughters to have for my grandchildren.  I was so determined to finish them to be used in December, that I neglected to take photographs of the finished feather tree quilt with all the wool ornaments attached.  You can look back at several blog posts about the wool ornaments, here, here, here, here, and here, that I made throughout 2013 & 2014.

I also completed two Christmas table toppers from my Groovy Girls Club days with my two sisters.  I spent November and part of December machine quilting both of the Advent calendars and table toppers.  And finally, I finished the binding on my second Dotty Quilt…finally.  I sent the quilt out to the long-armer in January last year.  I attached the binding, but never completed hand stitching it down until New Year’s Eve.  I decided that I wouldn’t move on to another project until the binding was finished.  As I think about it, the quilt really isn’t finished, because I still need to add the label.

I am on to other projects.  I always set quilting goals for the year.  Some are new and others are UFO’s and WIPs.  Maybe I’ll find the time to come back here and let you know about them.  Hopefully, I won’t be away for so long this time.

Happy Stitching!

Tag Cloud